Gurdeep Suri, Author at Immikare - Page 2 of 4

Benefits Of Social Security For Green Card Holders

There’s a wealth of information available to green card holders regarding the benefits of Social Security, a crucial aspect of financial planning for immigrants in the United States. Understanding the intricacies of Social Security can significantly impact the financial stability and well-being of green card holders, providing them with crucial support during retirement or in times of need.

In this comprehensive guide, we will investigate the various benefits that Social Security offers to green card holders, ensuring that they are well informed and empowered to make informed decisions about their financial future.

Key Takeaways:

  • Green card holders are eligible for Social Security benefits: Green card holders who fulfill certain requirements can qualify for Social Security benefits just like U.S. citizens.
  • Work history matters: The amount of Social Security benefits you receive as a green card holder is based on your work history in the U.S. and the number of credits you have accumulated.
  • Social Security benefits can provide financial stability: Social Security benefits can provide a source of income during retirement, disability, or in case of a spouse’s death, offering financial security for green card holders.
  • Understanding eligibility requirements is vital: Green card holders must meet specific criteria to be eligible for Social Security benefits, and seeking guidance from experts can help navigate the complex application process.
  • Benefits can be paid to family members: In some cases, Social Security benefits can also be paid to eligible family members of green card holders, offering additional support and assistance.

Types Of Social Security Benefits

If you are a Green Card holder, it is important to understand the different types of Social Security benefits available to you. Knowing the options can help you plan for your financial future more effectively. Here are the main types of benefits:

  1. Retirement Benefits
  2. Disability Benefits
  3. Family Benefits  
  4. Survivors’ Benefits
  5. Supplemental Security Income (SSI)

Retirement Benefits

If you are a Green Card holder who has worked in the United States and paid Social Security taxes, you may be eligible for retirement benefits. These benefits are based on your earnings history and the age at which you choose to start receiving them. Planning for retirement is imperative, and understanding your eligibility for these benefits is a crucial step in that process.

Disability Benefits

On the other hand, if you become disabled and are unable to work, you may qualify for Social Security disability benefits. These benefits can provide financial support to you and your family during a challenging time. To qualify, you must meet specific criteria set by the Social Security Administration.

Benefits for disability are designed to help individuals who are no longer able to work due to a medical condition that is expected to last at least one year or result in death. The application process for disability benefits involves providing medical evidence and documentation of your inability to work.

Survivors’ Benefits

Survivors’ benefits are available to family members of a deceased Green Card holder who was receiving Social Security benefits. These benefits can provide financial assistance to eligible family members, including spouses, children, and sometimes parents. Understanding the eligibility criteria and application process for survivors’ benefits is crucial to ensure that your loved ones are financially protected in case of your death.

The amount of survivors benefits you and your family members may receive is based on the earnings history of the deceased Green Card holder. It is important to consult with the Social Security Administration to determine your eligibility and the amount of benefits you may be entitled to.
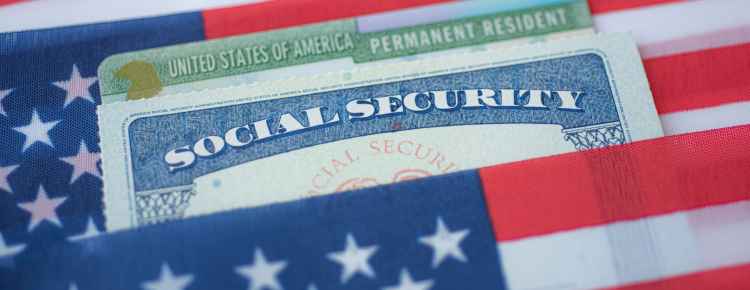
Accessing Social Security Benefits

Step-By-Step Guide To Accessing Benefits

Eligibility Requirements, Application Process

Eligibility Requirements

Any green card holder who has worked and paid Social Security taxes for at least 10 years is generally eligible to receive Social Security benefits. It is important to note that the number of work credits required may vary based on the individual’s age at the time they become disabled or retire.

Application Process

For green card holders looking to access Social Security benefits, the application process involves filling out the necessary forms, providing documentation such as proof of age, citizenship status, and work history, and submitting the application to the Social Security Administration. It is recommended to apply as soon as you become eligible to start receiving benefits promptly.

Requirements:

In addition to meeting the work credits requirement, green card holders must also be in lawful immigration status to receive Social Security benefits. This means having a valid green card and complying with all applicable immigration laws and regulations.

Factors Influencing Social Security Benefits

Despite being a green card holder, several important factors influence the social security benefits you are eligible to receive. Understanding these factors can help you make informed decisions regarding your retirement planning.

  • Duration of Work in the U.S.: Any work you have done in the United States, whether as a green card holder or on other visa statuses, can contribute to your social security benefits. The more years you have worked and paid into the system, the higher your potential benefits.
  • Citizenship Status: One key factor that can affect your social security benefits is your citizenship status. While green card holders are generally eligible for social security benefits, there are certain restrictions based on citizenship status that may impact the amount you receive.

Duration Of Work In The U.S.

Any work you have done in the United States, whether on a temporary visa or as a green card holder, can count towards your social security benefits. The amount you receive is based on your earnings history and the number of years you have worked and paid into the social security system. The longer you work in the U.S., the higher your potential benefits will be.

Citizenship Status

One of the factors that can influence your social security benefits as a green card holder is your citizenship status. While green card holders are generally eligible to receive social security benefits, there are some restrictions based on citizenship status that may impact the amount you are eligible to receive. For example, certain noncitizens may be subject to additional withholding taxes on their benefits.

Pros And Cons Of Social Security For Green Card Holders

Once again, understanding the pros and cons is crucial in making informed decisions regarding participation. Below is a breakdown of the advantages and potential limitations of enrolling in Social Security as a Green Card holder.

Advantages of Participation

Pros: Green Card holders who participate in Social Security are eligible to receive retirement benefits, disability benefits, and survivor benefits. These benefits can provide financial security and support during times of need, ensuring a safety net for individuals and their families.

Potential Limitations and Considerations

Pros: While participating in Social Security offers numerous advantages, there are also potential limitations and considerations to keep in mind. Green Card holders may face restrictions on the types of benefits they can receive and may be subject to certain eligibility criteria based on their immigration status.

Cons: Green Card holders should be aware that their Social Security benefits could be impacted if they return to their home country for an extended period of time or if they plan to relinquish their Green Card in the future. It is important to carefully weigh the benefits and potential drawbacks before making decisions about Social Security participation.

Tips for Maximizing Social Security Benefits

To maximize your Social Security benefits as a green card holder, it is important to understand the rules and regulations surrounding eligibility requirements. Make sure you have worked the minimum number of years required to qualify for benefits and consider delaying your retirement to increase your monthly payout. Be proactive in monitoring your earnings and ensure they are accurately reported to the Social Security Administration to avoid any discrepancies that could affect your benefits.

  • Stay informed about any changes in Social Security policies that could impact your benefits.
  • Consider consulting with a financial advisor to create a strategic plan for maximizing your Social Security benefits.
  • Explore alternative strategies, such as spousal or survivor benefits, to optimize your overall Social Security income.

Assume that you take the necessary steps to stay informed and actively manage your Social Security benefits, you can ensure a more financially secure retirement.

Strategies for Increasing Retirement Savings

There’s a range of strategies you can employ to maximize your retirement savings potential. These include contributing regularly to retirement accounts such as 401(k)s or IRAs, taking advantage of employer matching contributions, and exploring investment options to grow your savings over time.

Planning for Family and Dependents

Retirement planning for green card holders also involves considerations for family members and dependents who may rely on your income in the future. This may include factors such as setting up a trust, designating beneficiaries, and ensuring that your loved ones will be financially supported in the event of your passing.

This comprehensive approach to retirement planning can provide peace of mind and security for both you and your family members, ensuring that everyone is taken care of in the long run.

Conclusion

So, understanding the benefits of Social Security for green card holders is crucial for ensuring financial security and stability in the United States. By knowing the eligibility requirements and the different types of benefits available, green card holders can make informed decisions to take advantage of these government programs. Whether it is retirement benefits, disability benefits, survivor benefits, or Medicare, Social Security provides a safety net for individuals who have worked and paid into the system. Stay informed and plan ahead to maximize the benefits you are entitled to as a green card holder.

FAQ

Q: Can green card holders receive Social Security benefits?

A: Yes, green card holders can be eligible for Social Security benefits and can receive Social Security benefits provided they have worked in the United States for a certain number of years and paid Social Security taxes.

Q: How does someone qualify for Social Security benefits as a green card holder?

A: To qualify for Social Security benefits, a green card holder must have worked in the United States for a certain number of years and paid Social Security taxes. The specific requirements vary based on age and work history.

Q: Can green card holders receive both Social Security benefits and their pension from another country?

A: Yes, green card holders can receive Social Security benefits even if they receive a pension from another country. However, there may be some impact on the total amount received depending on the specific circumstances.

Q: Are there any restrictions on green card holders receiving Social Security benefits if they return to their home country?

A: Green card holders can continue to receive Social Security benefits if they return to their home country, as long as they remain eligible based on their work history and tax contributions in the United States.

Q: Can green card holders pass on their Social Security benefits to their family members?

A: In some cases, family members of green card holders may be eligible to receive survivors benefits based on the work history of the green card holder. This includes spouses, children, and in some cases, parents.
Navigating The I 539 Form For Nonimmigrant Status Changes

If you’re a nonimmigrant in the U.S. needing to extend or change your status, navigating the I-539 form is a critical step. This guide simplifies the application process, highlighting what you need to know to file successfully without risking your legal stay. Learn the essentials without the guesswork.

Key Takeaways

  • Form I-539 is used by nonimmigrant visa holders in the United States to extend their stay, change their status, or apply for certain benefits, and must be filed before the current authorized stay expires with proper supporting documentation for a financial ability to stay.
  • The Form I-539 application process involves providing detailed biographical information, application details for change or extension of status, signatures and declarations, and the correct payment of required filing fees, including changes to biometric services fees after October 1, 2023.
  • Applicants should regularly check their application status through a USCIS online account, prepare for potential biometrics appointments, and understand the implications of approval or denial, including the possibility of appealing a denial and the impact on future immigration attempts.

Understanding Form I-539: Purpose And Applicants

Understanding Form I-539 application Form

Form I-539 is a bridge for nonimmigrant visa holders, offering a legal pathway to change or extend their status. It is meticulously designed by U.S. Citizenship and Immigration Services (USCIS) to facilitate nonimmigrants in maintaining their lawful stay in the country. Various groups frequently rely on Form I-539 for immigration benefit requests, including those seeking to extend their stay, change to another nonimmigrant status, or even become residents of the Commonwealth of the Northern Mariana Islands. The form also serves as a potential stepping stone to a green card application if a nonimmigrant visa holder becomes an immediate relative of a U.S. citizen or green card holder.

Timely filing of Form I-539 is of utmost importance. It is recommended that the form is filed at least 45 days before the current authorized stay expires. However, in some cases, late filings may be excused if the delay was due to extraordinary circumstances beyond the applicant’s control. Navigating this process requires understanding not only the purpose of Form I-539 but also who should file it and what the form accomplishes.

Who Should File Form I-539?

The Form I-539 is not a one-size-fits-all solution but is designed for specific categories of nonimmigrant visa holders. Individuals in the United States on a nonimmigrant visa who need to extend their stay beyond the visa’s expiration date should file Form I-539. Dependents such as a spouse or child of the primary visa holder should also file Form I-539 to maintain their derivative status. The form also caters to children of the primary dependent, requiring them to file Form I-539A in addition to the primary applicant’s I-539 form. Nonimmigrants in the U.S. with J visa status should also remember to check the box in Question 16. This is because their Form I-94 may indicate D/S for duration of status.

What Does Form I-539 Accomplish?

The Form I-539 serves a dual purpose: it allows nonimmigrants to either extend change nonimmigrant status or transition to a different nonimmigrant category. The beauty of this form lies in its flexibility – it allows nonimmigrant visa holders to maintain lawful status while awaiting a decision on a different future status, provided they file for an extension or change of status before their current authorized stay expires.

Eligibility to file Form I-539 is limited to those who:

  • Were lawfully admitted to the U.S. with a nonimmigrant visa
  • Are not currently in expired status
  • Have not committed violations that would make them ineligible.

Step-By-Step Guide To Completing Form I-539

Completing Information On Form I-539

Completing the Form I-539 can be likened to a puzzle. Each piece of information fits into a specific part of the form, and missing even one piece can lead to an incomplete picture. Correctly filling out this form is key to the application’s success. The form is divided into four main sections:

  1. Biographical information
  2. Application type
  3. Processing information
  4. Additional details about the applicant and the application

The USCIS also offers the option of filing Form I-539 electronically for eligible applicants with an online account number.

Before we delve into the nitty-gritty of each section, it’s worth emphasizing that using the correct form version and requesting the accurate nonimmigrant status is crucial. This underscores the importance of careful review of the filing instructions before submission.

Let’s start examining each section, beginning with the biographical information.

Biographical Information

The first part of Form I-539 requires information about you – the applicant. This section includes:

  • Your family name
  • Your country of birth
  • Your country of citizenship or nationality
  • U.S. date format for your date of birth
  • Identification numbers like the Alien Registration Number (if available), USCIS Online Account Number, Social Security Number (if applicable), and the I-94 Arrival-Departure Record Number.

The required information for the form includes:

  • Full name
  • Date of birth
  • Gender
  • Social security number (if applicable)
  • Current address
  • Phone number
  • Email address
  • Most recent passport number
  • Issuing country
  • Current nonimmigrant status

If the passport has expired after entry into the U.S., details of the expired passport must also be provided. Remember, the form will be rejected if any required fields in Part 1 are missing, emphasizing the importance of a complete application.

Application Details

The second part of Form I-539 is all about your application. Here, you must specify the type of application, which can be:

  • Reinstatement to student status
  • Extension of stay
  • Status change
  • Including dependents

The specific nonimmigrant status being requested must also be indicated in Questions 3.b or 3.c of Part 2.

For those seeking a change of status, they must provide the requested new status effective date and indicate the specific change requested. You must also clearly state the total number of people included in the application in Part 2.

If seeking only an extension of your current status, you should accurately mark the appropriate extension box in Part 2 of the form.

Signature And Declaration

The final segment of Form I-539 is dedicated to signature and declaration. Your signature is a vital part of the form. Any unsigned form will be rejected by USCIS. If the applicant is under 14 years of age, a parent or legal guardian is authorized to sign for the child on Forms I-539 or I-539A. Important to note is that digital signatures are not accepted; only wet ink signatures are valid.

The applicant must:

  • Sign and date the form in Part 5
  • If assisted by an interpreter, the interpreter must also complete and sign Part 7
  • If the form was prepared by someone else, including a spouse or parent, that individual must fill and sign Part 7 as a preparer.

Required Documentation For Form I-539

Gathering Required Documentation For Form I-539

Submitting Form I-539 is not just about filling in the fields on the form; it’s also about providing supporting documentation. This includes a completed and signed Form I-539, the appropriate filing fee, and copies of your passport and nonimmigrant visa or admission stamp. If you’re including dependents in your application, you’ll need to accompany the primary Form I-539 with a completed Form I-539A for each dependent.

Proofs of identity and legal nonimmigrant status are also required, including:

  • A copy of the electronic I-94 or the front and back of a paper I-94 card
  • Photocopies of the personal data pages of your passport
  • A photocopy of your U.S. visa along with any U.S. immigration stamps or endorsements

Alongside these, a written statement outlining the reasons for the extension or change status request should be provided, along with evidence demonstrating your temporary stay and departure plans.

Proof Of Financial Support

Financial stability is a critical factor in any immigration application. As such, you must provide evidence demonstrating your financial ability to support yourself for the duration of your extended stay in the U.S. Bank statements and evidence of income are among the types of documentation accepted to show financial support.

If you’re not relying on your own financial resources, you may submit bank statements or financial details of a family member or friend who will be supporting you. The application must include a written statement that specifically addresses the financial arrangements made for your stay, supported by corresponding evidence.

Evidence Of Current Nonimmigrant Status

Another crucial piece of the puzzle is evidence of your current nonimmigrant status. You are required to include copies of your current visa, admission stamp, or Form I-94 as evidence of your lawfully admitted nonimmigrant status. The Form I-94, Arrival-Departure Record, plays a pivotal role in proving an individual’s lawful admission and nonimmigrant status. You can locate your Form I-94 record number either on the small white card provided upon entry by CBP or by accessing it on the I-94 website.

Submission of these copies of visas, admission stamps, or Form I-94 is crucial to demonstrate compliance with nonimmigrant status requirements.

Filing Fees And Payment Instructions

Paying Filing Fees For Form I-539

Filing Form I-539 comes with a cost. The filing fee for Form I-539 is currently $370, as of the time of writing. This fee is subject to change, so it is important to check for any updates before submitting the form. However, it’s important to note that up until October 1, 2023, there was an additional biometric services fee of $85 for each applicant and co-applicant.

Payments for the Form I-539 filing fee should be made payable to the ‘US Department of Homeland Security’. If you mistakenly submit a biometric services fee separately or as part of a combined payment postmarked on or after October 1st, USCIS will return the individual fee or process the application charging only the filing fee.

How To Pay The Filing Fee

Paying the filing fee for Form I-539 can be done online using a credit/debit card or bank withdrawal if you are inside the United States. Credit card payments can also be made using Form G-1450. The credit card payments can be made with cards issued by U.S. banks, including American Express, MasterCard, Visa, Discover, and certain prepaid cards.

If you prefer to pay by mail, you can do so with a check or money order. These must be payable to the U.S. Department of Homeland Security and drawn on U.S. financial institutions.

Biometrics Requirement

As of October 1, 2023, USCIS has made the following changes to the biometric services fees for Form I-539 applications:

  • The mandatory $85 biometric services fee has been eliminated for all Form I-539 categories, including H-4, L-2, and E nonimmigrant status extensions or changes.
  • As a result of the fee exemption, most Form I-539 applicants are not expected to be scheduled for a biometric services appointment.
  • These changes could potentially affect application processing times.

If you incorrectly submit a biometric services fee separately or as part of a combined payment postmarked on or after October 1st, USCIS will return the individual fee or process the application charging only the filing fee, without premium processing.

Timeline And Processing Expectations

Checking USCIS Online Account For Application Status

The Form I-539 application process is more of a marathon than a sprint. The processing time for Form I-539 can vary based on eligibility and visa category, with certain nonimmigrant categories facing restrictions or ineligibility to extend or change status. While waiting, it’s crucial to utilize the USCIS online account to regularly check the status of your I-539 application as processing times can vary.

Remember, you must file for an extension or change of status before your authorized stay expires to avoid the need to justify any delays as being due to extraordinary circumstances.

Estimated Processing Timeframes

Projecting the processing timeframes for Form I-539 is similar to forecasting the weather. Certain factors, such as form category, service center workload, and individual case complexity, can affect how long you might have to wait for a decision. However, understanding these factors and regularly checking the application status will help set realistic expectations for the I-539 processing timeline.

Checking Your Application Status

In the age of digital technology, tracking the status of your Form I-539 application has never been easier. A USCIS online account allows you to submit forms, pay fees, and most importantly, track the status of your Form I-539 application securely. This account is a critical resource for staying updated about your case at no cost.

A USCIS online account allows real-time monitoring of your application’s progress. The USCIS Online Account Number is a unique identifier that connects you to your filed Form I-539 and allows you to check the status online.

After You File: Next Steps And Possible Outcomes

Completing your Form I-539 is a significant step, but the journey doesn’t end there. After filing, you may need to prepare for a biometric services appointment by bringing your ASC appointment notice to the scheduled biometrics appointment. It’s important to remember that USCIS generally does not approve extensions or changes of status for individuals who fail to maintain their previously accorded status.

Being ‘out of status’ as a result of status expiration or violations prior to filing Form I-539 can make the process to change nonimmigrant status unattainable except under specific circumstances.

Scheduled Biometrics Appointment

While the biometric services fee has been exempted for all Form I-539 applications effective October 1, 2023, some applicants may still be scheduled for a biometrics appointment. If biometrics are deemed necessary, USCIS will send a notice to the applicant with instructions for attending the biometric services appointment. The appointment is typically set after the form has been filed and any applicable fees, before the exemption, were paid.

To attend the scheduled biometrics appointment, applicants must bring the ASC appointment notice, which is Form I-797C.

Approval, Denial, And Appeals

The outcome of your Form I-539 application can take one of three paths: approval, denial, or appeal. If your application is denied, you must leave the U.S. However, if your current visa is still valid, you have until the expiration date on your I-94 to depart. If you fall out of status, you may have to leave the U.S. to avoid negative implications for future re-entry.

However, USCIS may approve an untimely filed application to extend your stay, assuming the delay was due to extraordinary circumstances beyond your control. Remember, each case is evaluated individually by USCIS officers, who are not obligated to follow previous application outcomes when making their decisions.

Navigating Complex Scenarios

Much like life, the Form I-539 application process can present unexpected challenges. Changes in USCIS policies or form instructions can influence the outcome of pending applications. Using the incorrect version of Form I-539 may result in the application being rejected or denied, and the filing fees will not be refunded in case of denial.

For applicants submitting Form I-539 from outside the U.S., the available payment methods may differ and should be verified with the relevant International USCIS office or U.S. Embassy or Consulate.

Changes While Application Is Pending

Just as change is an inevitable part of life, it’s also a constant in the Form I-539 application process. Changes in personal circumstances or immigration laws while the application is pending can affect the outcome. However, a late filing may be excused if it can be shown that the delay was caused by extraordinary events that were beyond your control.

For a delay to be considered excusable, you must also demonstrate that the length of time taken to file after the delay was reasonable.

Employment Authorization During Processing

It’s important to keep in mind that while your Form I-539 application is pending, you still need to comply with the conditions of your present status. This means you may not be authorized to work or attend school until your application has been approved. If you violate the terms of your status, such as by working without authorization before your Form I-539 is approved, you may fall out of status and consequently become ineligible for a change or extension of status.

However, under certain circumstances, you can remain in the U.S. for up to 240 days while your I-539 application is pending. If you wish to work while your Form I-539 application is pending, you must first obtain an Employment Authorization Document (EAD) by filing Form I-765, and you cannot begin employment until the EAD is approved.

Summary

Navigating the Form I-539 application process can seem like a daunting task. However, by understanding the purpose of the form, who should file it, and what it accomplishes, you’re already halfway there. The journey involves a step-by-step guide to completing the form, providing the required documentation, paying the filing fees, and understanding the timeline and processing expectations. After filing, you must be prepared for the possible outcomes and know how to navigate complex scenarios that may arise. Remember, each journey is unique, and each case is evaluated individually. Stay informed, stay prepared, and you’ll be able to navigate this journey successfully.

Frequently Asked Questions

What is Form I-539 used for?

Form I-539 is used to apply for a variety of nonimmigrant statuses, including B-1/B-2 visitor status, F-1 student status, and H-4 dependent status. It is also used to request an extension of stay or a change to another nonimmigrant status.

How long does it take for I-539 to be approved?

The processing time for USCIS form I-539 can take from 5 to 14 months, depending on the type of nonimmigrant status requested. It is best to check the USCIS website for the most current processing estimates.

Can I stay in U.S. while I-539 is pending?

Yes, you can stay in the U.S. while your I-539 is pending, as you’re placed on an “authorized stay” until a decision is made. This allows you to remain in the U.S. for up to 240 days while your application is pending.

What is the difference between I 485 and I-539?

The main difference between I-485 and I-539 is that I-485 is for adjusting status to that of a legal permanent resident, while I-539 is for certain transitions or extensions of stay within the United States. Therefore, while the I-539 addresses non-immigrant status, the I-485 is for immigrant status.

Who should file Form I-539?

If you are in the United States on a nonimmigrant visa and need to extend your stay, you should file Form I-539. Dependents of the primary visa holder, such as a spouse or child, should also file this form to maintain their derivative status.

Navigating The I-129F Process For Your K-1 Visa Journey

Starting the K-1 visa application for your foreign fiancé(e) begins with the I-129F form. This guide provides straightforward steps to complete your I-129F accurately, avoiding errors that could delay your reunion. Get ready to learn the essentials for a seamless K-1 application journey.

Key Takeaways

  • The I-129F form is crucial for the K-1 visa application process, requiring detailed information about the U.S. citizen petitioner and the foreign fiancé(e), with strict eligibility requirements including proof of a bona fide relationship and an in-person meeting within the last two years.
  • Accurately completing and submitting Form I-129F, along with all the required supporting documents and the $535 fee to the USCIS Dallas lockbox, is essential for a successful petition; errors, omissions, or missing fees can cause significant delays or rejections.
  • Applicants should systematically track their I-129F application status using the USCIS online tools and should prepare thoroughly for the K-1 visa interview; overcoming rejections involves responding promptly to Requests for Evidence (RFEs) or considering other options such as reapplying or appealing.

Understanding Form I-129F And Its Purpose

Form I-129F Application Form

The I-129F form – also known as the “Petition for Alien Fiancé(e)” – is the initial step in the K-1 visa process. It’s the ticket for your foreign fiancé(e) to legally enter the U.S. with the intention of marrying you, a U.S. citizen, within 90 days of their arrival. This form is your way of establishing a qualifying relationship for your K-1 visa application.

However, this form is not merely a paperwork exercise. The I-129F demands comprehensive and precise details about both the U.S. citizen petitioner and the foreign fiancé(e). Hence, comprehending the form and its objective thoroughly is vital before commencing your K-1 visa journey.

Eligibility Requirements

Before you can petition for a K-1 visa, you need to meet certain eligibility requirements. As the petitioner, you must be a U.S. citizen – green card holders, unfortunately, are not eligible. Furthermore, both you and your foreign fiancé(e) must be legally free to marry and not have any criminal records or immigration violations.

Lastly, you must provide proof of a bona fide relationship, which includes evidence that you have met your fiancé(e) in person at least once within the two years before submitting the I-129F form. Exceptions to this requirement can be made in cases where meeting in person would violate strict and long-established customs, or cause extreme hardship to the U.S. citizen petitioning.

Key Components of Form I-129F

Having discussed eligibility, we now turn our attention to the critical elements of the I-129F form. This document collects crucial information about both you, the U.S. citizen petitioner, and your foreign fiancé(e). It’s essential to provide accurate and complete details about both parties involved, as this information forms the backbone of your K-1 visa application.

Errors or omissions at this stage could be costly. Ensuring thoroughness and accuracy now will facilitate a smoother K-1 visa journey later.

Filing Form I-129F: Step-By-Step Guide

The I-129F form submission is a painstaking process demanding your complete focus and precision. This is not a task to rush through; instead, you need to carefully read through the instructions and ensure that every answer you provide is accurate and truthful. Any small errors or omissions can lead to significant delays in your petition, or worse, cause a denial. Remember, rejections often occur due to unsigned forms, so double-check everything before you send it off.

The form should be filed at the USCIS Dallas lockbox, and while this may seem like a small detail, it’s one of many that can make or break your K-1 visa application process.

Required Supporting Documents

Alongside your I-129F form, you’ll need to provide a number of supporting documents. These include:

  • Evidence of your U.S. citizenship, such as your birth certificate or an unexpired U.S. passport
  • Proof of your intent to marry your fiancé(e)
  • Evidence that you’ve met in person within the two years before filing, unless you’re exempt due to cultural or social practices.

Additional documents may include:

  • Certified English translations for any document not in English
  • Evidence to support an IMBRA waiver
  • Documentation for a legal name change if applicable
  • One color passport-style photograph of both you and your fiancé(e)

Submission Process and Fees

After gathering all required documents and filling out the I-129F form, the next step is submission. The form should be filed at the USCIS Dallas lockbox facility – and remember, USCIS international offices do not adjudicate the I-129F.

The filing fee for the form is $535, and it’s crucial that this is included with your submission. If you’re filing multiple forms, each filing fee must be provided separately to avoid rejection of the entire package. Finally, make sure you sign and date the form, as unsigned forms will be rejected.

Tracking Your I-129F Application Status

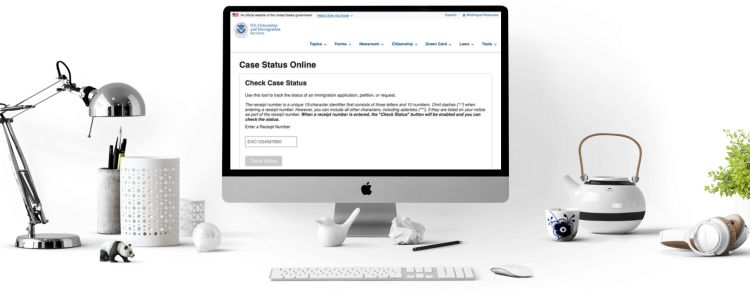
USCIS website screenshot

After your I-129F form has been submitted, it’s natural to want to keep track of your application status. You can do this by using the ‘Case Status Online’ tracker on the USCIS website, which requires your receipt number.

For a more comprehensive view of all your pending applications or petitions, you can create an account on my USCIS.

Should you require more detailed information about your case status, the California Service Center is available for inquiries through the USCIS Service Center Contact Center.

Remember, staying informed about your application status can help you anticipate any potential delays or issues and address them promptly.

Receipt Notice and Number

When USCIS accepts your I-129F form, they will typically send you a receipt notice containing a 10-digit receipt number within 30 days. This receipt number is a unique 13-character identifier that you can find on your Form I-797, Notice of Action. You can use this number to track your case status online, so keep it safe.

If you want to receive an email or text message when USCIS accepts your form, you can attach Form G-1145 to the front of your petition.

Common Reasons for Delays

While we all hope for a smooth and speedy process, delays can unfortunately occur. The processing time for K-1 fiancé visas currently ranges from 12 to 18 months, and this has noticeably increased over the past years. Other reasons for delays can include a growing number of pending I-129F cases or inconsistencies in your visa applications.

Additionally, missing USCIS appointments or failing to meet deadlines can extend the application process. Being aware of these potential pitfalls can help you avoid them and stay on track towards your K-1 visa.

Preparing For The K-1 Visa Interview

Illustration Of A Girl Attending K-1 Visa Interview

The K-1 visa interview is a significant step in your visa journey and requires ample preparation. Here are some tips to help you get ready:

  1. Be ready to provide a comprehensive overview of your relationship, answering detailed questions about your background, engagement, and future wedding plans.
  2. Organize your documents in a manner that allows easy identification and access during the interview.
  3. Consider seeking professional guidance to prepare for the interview.

Remember, honesty is key in your answers, and dressing appropriately can contribute to a favorable impression on the consular officer.

Scheduling the Interview

The U.S. Embassy or Consulate manages the scheduling of your K-1 visa interview and provides detailed instructions for preparation and attendance. It’s crucial to follow these instructions to the letter to avoid any potential issues. If you’re not adequately prepared for the visa interview, you could face delays or even denials, so attention to detail and compliance with all provided instructions are vital.

Note that the K-1 visa interview is mandatory, and the U.S. citizen sponsor is generally not allowed to attend. To ensure punctuality and reduce stress on the day of the interview, familiarize yourself with the location beforehand and plan to arrive early.

Necessary Documentation and Medical Exam

Before your K-1 visa interview, you’ll need to undergo a medical examination by an authorized panel physician, and it’s recommended that you get all required vaccinations. You’ll also need to provide several documents, including a passport valid for travel to the U.S., a birth certificate, divorce or death certificates of any previous spouse(s), and police certificates from your current and previous countries of residence since age 16.

Additionally, you’ll need to present evidence of your relationship with your U.S. citizen fiancé(e), and complete Form DS-160, Online Nonimmigrant Visa Application. Remember, proper preparation and staying informed about the National Visa Center can make the difference between a successful interview and a disappointing outcome.

Overcoming I-129F Rejections And Denials

While it’s a scenario we all hope to avoid, it’s important to be prepared for potential I-129F rejections and denials. About 1 in 5 applications for K1 fiancé visas was rejected in 2022, so you’re certainly not alone if you face this hurdle. Responding to requests for evidence in a timely and precise manner, appealing denials when justified, or contemplating a new application if required, are all crucial strategies.

It’s crucial to consult with an immigration lawyer in such cases, as misrepresentation of facts can result in visa denial and create problems later in the immigration process.

Request for Evidence (RFE)

A Request for Evidence (RFE) is issued by USCIS when they need additional information or clarification to proceed with your I-129F petition evaluation. If you receive an RFE, it’s important to respond by providing all requested documentation and explanations by the specified deadline. Common reasons for an RFE can include missing initial evidence, insufficient income of the sponsoring spouse, or missing proof of legal entry.

To address an RFE relating to the authenticity of your relationship, you can provide evidence such as wedding invitations, photographs, and statements from acquaintances. Remember, any non-English documents must be accompanied by certified English translations.

Appealing a Denial

If your I-129F application is denied, don’t lose heart. While nonimmigrant visa decisions, including the K-1, do not have a formal appeal procedure, you have a few options:

  • You can file a request for reconsideration with the U.S. Consulate or USCIS may send the petition back for a potential new interview.
  • Certain I-129F petition denials can be appealed to the U.S. immigration court.
  • You may seek an immigration waiver for inadmissibility issues.

Alternatively, couples can marry outside the U.S. and apply for an immigrant visa, potentially demonstrating a higher commitment level. Each case is unique, so it’s important to explore all options available to you.

After K-1 Visa Approval: Next Steps

Once your K-1 visa has been approved, the journey isn’t over just yet. The K-1 visa holder is required to:

  • Enter the United States within 6 months from the visa issuance date
  • Once in the U.S., the couple must marry within 90 days of the sponsored fiancé’s arrival
  • If the marriage doesn’t take place within the stipulated 90 days, the foreign-citizen fiancé must leave the United States immediately.

After marriage, the couple can then move on to the next step: applying for a marriage-based green card to make the foreign spouse a green card holder, also known as a lawful permanent resident.

Marriage Timeline and Requirements

In the midst of all the joy and excitement, don’t forget that you have a timeline to abide by. You must marry within 90 days of the sponsored fiancé’s arrival in the U.S. This might mean planning a wedding that allows for flexibility, considering a simpler ceremony that can be adjusted within this time frame.

The sponsored fiancé may also need to apply for work authorization by filing Form I-765 if they intend to work. It’s a whirlwind period, but with careful planning and adherence to the rules, you can navigate through it smoothly.

Adjusting Status and Green Card Application

After the wedding bells have rung and the confetti has settled, it’s time to focus on the next step: adjusting your status and applying for a green card. To initiate the process of becoming a lawful permanent resident, the foreign fiancé(e) should file Form I-485, Application to Register Permanent Residence or Adjust Status. Accompanying this form, you’ll need to provide a set of documents including the I-129F approval notice, marriage certificate, photos, identification, birth certificate, and Form I-693 to fulfill health requirements.

If you were married for less than two years when Form I-485 is approved, you’ll receive conditional permanent resident status and will need to file Form I-751 before the conditions can be removed.

Tips For A Smooth I-129F And K-1 Visa Process

While the I-129F and K-1 visa process can be intricate, meticulous planning and preparation can make the journey less daunting. It’s crucial to understand that the K-1 visa does not allow for a change to another nonimmigrant travel visa, and adjustment of status to a marriage-based green card is only permitted with the original U.S. citizen sponsor.

If the K-1 visa holder decides to travel outside the country before adjusting their status, they should apply for advance parole using Form I-131. This will ensure there are no issues when re-entering the country.

Thoroughly Review Form I-129F Instructions

An in-depth review of the I-129F instructions is a fundamental first step towards a successful application. It aids in clearly understanding the intent of the questions, which is crucial for providing accurate responses and maintaining the integrity of the petition. Being meticulous with your application can help prevent requests for evidence (RFEs) and avoid unnecessary delays.

No detail is too small when it comes to your K-1 visa application, so take the time to review and prepare your I-129F form thoroughly.

Provide Accurate and Complete Information

Accuracy is key when it comes to filling out your I-129F form. It’s vital to provide information that is current and truthful, as any discrepancies can lead to delays and further scrutiny of your application. Remember, submitting false information on the I-129F can lead to the form being denied, or if discovered later, can result in revocation of the visa or legal status.

Honesty is the best policy when it comes to your K-1 visa application.

Seek Professional Assistance

Although it’s feasible to handle the K-1 visa process independently, obtaining professional help can significantly enhance your prospects. An experienced immigration attorney can analyze previous application failures and provide guidance for future success. They can also offer invaluable insight on how to address potential issues and avoid visa processing delays.

Consider engaging professional citizenship and immigration services to minimize the risk of application rejection or denial and confidently navigate each step of your immigration journey.

Summary

Navigating the I-129F and K-1 visa process can be a daunting task, but with the right knowledge and preparation, it’s entirely manageable. From understanding the purpose of the I-129F form to preparing for the K-1 visa interview, each step is crucial in your journey towards uniting with your loved one. Remember, careful planning, thorough preparation, and honesty are your best allies in this process. So, arm yourself with these tips and embark on your exciting journey towards a new life together.

Frequently Asked Questions

Which is faster 129F or 130?

The Form I-129F visa application is faster than the Form I-130, with a waiting time of 10.5 to 16.5 months compared to 14.5 to 60 months, respectively.

How much is the fee for I-129F?

The fee for filing Form I-129F is $535, and there is no filing fee when filing for a K-3 spouse. Additional costs may be incurred during the K-1 visa process.

How long does it take for I-129F to be approved?

It typically takes around 6 months for the I-129F form to be approved, based on current processing times. After approval, it can take an additional four to six weeks for USCIS to transfer the case to the National Visa Center.

Who is eligible to file Form I-129F?

Only U.S. citizens are eligible to file Form I-129F. Green card holders cannot file this form. Both the petitioner and the foreign fiancé(e) must be legally free to marry and have no criminal records or immigration violations.

Navigating The I-129 Petition Process For Nonimmigrant Workers

If you’re puzzling over Form I-129 for hiring nonimmigrant workers in the U.S., look no further. This article demystifies the filing process, requirements, and fees, equipping employers with the knowledge to proceed confidently. Discover the specifics of completing the form, the essential documents you’ll need, and how to avoid common errors, ensuring your petition stands on solid ground.

Key Takeaways

  • Form I-129 is an essential petition filed by U.S. employers to sponsor foreign nationals for temporary work across various nonimmigrant classifications, including but not limited to H-1B, L-1, and O-1 visas.
  • Filling out Form I-129 requires meticulous attention to detail, provision of extensive information specific to each nonimmigrant classification, and submission of supporting documents as proof of eligibility.
  • Form I-129 is critical not just for initial employment, but also for extension or change of an employee’s nonimmigrant status, requiring adherence to eligibility criteria, correct documentation, and understanding of the processing timeline.

Understanding Form I-129: A Comprehensive Overview

Illustration Of Form I-129

Form I-129 acts as your conduit to inviting foreign expertise to your U.S. enterprise. This form, filed by you, the employer, with the United States Citizenship and Immigration Services (USCIS), is the cornerstone of your nonimmigrant worker’s journey to legally working for your organization. Once approved, your nonimmigrant worker is authorized to commence or continue working at your establishment.

The vital role of Form I-129 is reflected in its goal: sponsoring foreign nationals for temporary work in the U.S.. It serves as a critical component in the visa application process for several nonimmigrant visa classifications. Essentially, Form I-129 is the first step in securing talent from abroad.

What Is Form I-129?

Fundamentally, Form I-129 serves as a petition for a nonimmigrant worker. As a U.S. employer, you use it to bring foreign workers to the United States for temporary employment in various categories. This main form provides a means for you to sponsor foreign nationals for temporary work in the U.S..

From H-1B visas for specialty occupations to L-1 visas for intracompany transferees, Form I-129 is integral to the visa application process for several nonimmigrant visa classifications. So, whether you’re looking to bring in a software engineer from India under the H-1B category or transfer an executive from your Canadian branch under the L-1 classification, Form I-129 is indispensable in your immigration journey.

Who Can Use Form I-129?

Form I-129 doesn’t adopt a one-size-fits-all approach. It’s designed to cater to specific nonimmigrant classifications. There are several classifications of visas, such as:

  • H-1B
  • H-2A
  • H-2B
  • H-3
  • L-1
  • O-1
  • O-2
  • P-1
  • P-1S
  • P-2
  • P-2S
  • P-3
  • P-3S
  • Q-1
  • R-1

These are just a few examples.

Form I-129 is not solely for new employment petitions. It also becomes relevant when a foreign national already in the U.S. aims for an extension of stay or a change of status to E-1, E-2, E-3, H-1B1, or TN. So, whether you’re petitioning for a new worker or looking to extend or change the status of a current foreign national employee, Form I-129 is your go-to tool.

Filling Out Form I-129: Step-by-Step Instructions

Filling Of Form I-129

Though it might appear overwhelming, navigating Form I-129 is certainly manageable. The key lies in understanding the form’s requirements and meticulously providing accurate and complete information. Wondering how to fill out Form I-129? Here’s a step-by-step breakdown.

From identifying the right nonimmigrant classification to providing all necessary supporting documents, each step of the Form I-129 process is crucial. But filling out the form is just the first step. Moving forward, let’s examine the required information and supporting documents in more detail.

Required Information

Filling out Form I-129 requires a plethora of information tailored to the specific nonimmigrant classification. For example, employers seeking to bring in workers under H-1B, H-1B1 Chile/Singapore, L-1, and O-1A classifications must complete Part 6 of Form I-129, which pertains to the release of controlled technology or technical data to foreign persons in the U.S..

Depending on the nonimmigrant classification, you might need to provide evidence of the proposed job being a specialty occupation or present a Labor Condition Application certified by the Department of Labor. Furthermore, for H-3 nonimmigrants, you’ll need to present supporting evidence, including details of the training program, staff, and facilities. Clearly, the information required is extensive and specific, underlining the need for meticulous attention to detail.

Supporting Documents

Alongside the required information, Form I-129 also necessitates specific supporting documents, known as required initial evidence. These documents serve as proof of the beneficiary’s qualifications, contracts, and even certified translations for documents not in English.

For instance, H visa category petitions require specific documents like DOD project descriptions for Defense Department project workers, and explanations of the training’s necessity and benefits for H-3 trainees. L visa petitions need evidence of physical premises for the new office and financial ability, along with detailed job duties and qualifications. The supporting documents required are as diverse as the visa classifications themselves, further emphasizing the need for meticulous preparation.

Tips For Avoiding Delays and Errors

While the process of completing Form I-129 can seem intricate, following a few tips can help you sidestep delays and mistakes. To ensure a smooth procedure, it is recommended to:

  • Complete the entire form accurately
  • Use black ink and type or print legibly
  • For any non-applicable item, use ‘N/A’
  • Avoid errors at all costs as they might necessitate restarting the form

Make sure to submit legible copies, not originals, of supporting documents in English, with certified translations for any documents in foreign languages. Assemble the application package in the USCIS-recommended order, use single-sided, standard letter-size pages, and send the package to the correct USCIS address with a tracking-capable courier.

These tips and more can help streamline your Form I-129 filing process, minimizing delays, and errors.

Form I-129 Filing Process And Timeline

Form I-129 Filing Process And Timeline

Having filled out Form I-129 and gathered all the necessary information and documents, you might ask, ‘What comes next?’ The filing process commences. As the employer, you must file the petition with USCIS. The form must be submitted to the appropriate USCIS Service Center, depending on the nonimmigrant classification sought and your location.

But when should you file Form I-129? It is advised to file the form at least 45 days before the prospective employment start date and no more than 6 months in advance. However, different requirements may apply for employment in fashion modeling or for Department of Defense cooperative research and development projects.

With the petition filed, let’s explore the filing fees, payment methods, and the filing fee exemption supplement.

When And Where To File Form I-129

The ‘where’ and ‘when’ of filing Form I-129 are critical aspects of the process. For employment or services in the Commonwealth of the Northern Mariana Islands (CNMI), regardless of classification, the form must be filed with the Texas Service Center.

Certain nonimmigrant classifications, including:

  • E-1
  • E-2
  • E-3
  • H-3
  • R-1
  • Q-1
  • P-1
  • P-2
  • P-3
  • O-1
  • O-2

must also file Form I-129 at the Texas Service Center.

Employers should avoid submitting a Form I-129 petition more than 6 months before the employment start date, as per advice. This timing is recommended to ensure compliance with regulations. To extend any authorized period of stay, employers should file at least 45 days before the expiration of the current authorized stay. It’s all about timing, ensuring that the form is filed neither too early nor too late.

Filing Fees And Payment Methods

Filing Form I-129 is accompanied by specific fees, including biometric services fees when applicable. As of the latest information available before April 1, 2024, the required fee for processing Form I-129 is $460. Remember, the filing fee is non-refundable, regardless of whether the petition is withdrawn or denied.

Payments can be made using a money order, personal check, cashier’s check, or by credit card with Form G-1450. Note that additional fees for specific visa petitions may apply, which can vary depending on the visa category, company size, and the proportion of employees in certain nonimmigrant statuses. Always ensure that payments are made accurately to avoid any hiccups in the process.

Processing Time And Status Updates

Once Form I-129 is filed and the fees paid, the waiting game begins. The processing time for Form I-129 can vary based on the USCIS Service Center processing the form and the nonimmigrant visa category. USCIS offers a case processing time tool that predicts timeframes for processing Form I-129 based on the form category and the responsible USCIS office.

As the petitioner, you can check the status of the Form I-129 online using the USCIS case status tool with the 13-character receipt number. Current Form I-129 processing times are available on the USCIS website for different visa categories and Service Centers. For status updates via phone, petitioners inside the U.S. can contact the USCIS National Customer Service Center, while those outside the U.S. have specific numbers and international field offices to contact. It’s always essential to stay informed about the status of the petition.

Extending Or Changing Nonimmigrant Status With Form I-129

Illustration of nonimmigrant workers with different visa categories

Form I-129 is not solely purposed for bringing foreign workers to the U.S.; it also serves as a crucial tool for extending or changing nonimmigrant status. In other words, if you’re an employer with a foreign national already working for you in the U.S., Form I-129 is your key to prolonging their stay or altering their nonimmigrant classification.

What happens when the nonimmigrant worker’s current nonimmigrant work visa is nearing expiration, or if a change in their employment status necessitates a change in their nonimmigrant classification? Form I-129 comes into play. Employers must file Form I-129 to apply for an extension or change of nonimmigrant status for their workers who are in specific nonimmigrant visa categories. This process is crucial for maintaining the legal status of nonimmigrant workers in the U.S..

Eligibility Criteria

To extend or change a nonimmigrant worker’s status using Form I-129, certain eligibility criteria must be met. For instance, nonimmigrant workers in classifications like E-1, E-2, E-3, H-1B, H-1B1, L-1, O-1, or TN have a grace period of up to 60 days following employment termination to maintain legal status. This grace period allows temporary non agricultural workers to file for a change of status, seek new employer-sponsored nonimmigrant status, or transition to a dependent, student, or visitor temporary visa.

However, to be eligible to request an extension or change of nonimmigrant status using Form I-129, the individual must meet the following criteria:

  • They must have been lawfully admitted into the U.S. with an appropriate nonimmigrant visa.
  • They must not have committed acts that would render them ineligible for immigration benefits.
  • There must be no other factors mandating their departure from the U.S.

These criteria ensure that only those maintaining legal status are eligible for extension or change of status.

Required Documentation and Procedure

Requesting an extension or change of nonimmigrant status using Form I-129 involves a specific procedure and required documentation. The petitioner must file a request for an extension of stay on behalf of the beneficiary using Form I-129 before the expiration date on Form I-94 or as noted in the passport or travel document.

The beneficiary must also apply for an extension of stay, another immigration benefit, or must depart the United States before the expiration date on Form I-94. Similarly, dependent family members must use Form I-539 to request an extension of stay, apply for another immigration benefit, or depart the United States before their own Form I-94 expires. The procedure and required documentation for immigration benefit requests are designed to ensure the seamless extension or change of status for nonimmigrant workers.

Navigating The Visa Approval Process

Photo of a Form I-797, Notice of Action/Approval

Having successfully negotiated the Form I-129 filing process for an existing visa, you’re now ready to tackle the visa approval process. After the USCIS approves Form I-129, a notice is sent to the National Visa Center, which will instruct you, the petitioner, on the next steps for visa application. The beneficiary must then complete the DS-160, Online Nonimmigrant Visa Application, as part of the requirements for obtaining a nonimmigrant visa.

The next crucial step is the visa interview. The beneficiary is required to schedule and attend a visa interview at a U.S. consulate or embassy in their home country to move forward with the visa process. The visa approval process, although intricate, is a crucial phase in securing a nonimmigrant visa for your foreign worker.

Form I-797, Notice Of Action/Approval

After Form I-129 is approved, USCIS sends an I-797, Notice of Action, to notify you, the petitioner, of the approval. This form serves as an official notification of action taken on the petition, and its receipt marks a significant milestone in the visa application process.

Upon approval of Form I-129, the beneficiary must present Form I-797, Notice of Action, or a copy of the approved Form I-129S while attempting entry or re-entry into the United States under the approved employment category. Attorneys representing the petitioner may also receive a courtesy copy of the I-797 approval notice.

Form I-797B is specifically issued for the approval of a noncitizen worker petition, such as those filed with Form I-129.

Consular Processing And Visa Issuance

The last stage in the visa application process involves consular processing and visa issuance. Even after Form I-129 is approved by USCIS, visa issuance isn’t guaranteed as the visa status still needs to be determined. The consular officer will review the petition and screen the beneficiary during the visa interview.

To assist the beneficiary with the visa interview process, a consular packet with documents and instructions can be provided. This step, though nerve-wracking, is the final phase before the visa is issued and the nonimmigrant worker can legally begin or continue their employment in the U.S.

Summary

Navigating the Form I-129 process, from understanding the form to navigating the visa approval process, can be a complex journey. Yet, with a clear understanding of the steps involved, from filling out the form to the visa issuance, it is undoubtedly manageable. Remember, each step, whether it’s providing the correct information, submitting the right supporting documents, or adhering to the filing process and timeline, plays a significant role in successfully securing a nonimmigrant visa for your foreign worker. As an employer, it’s your key to unlock the world of global talent and bring it to your U.S. enterprise.

Frequently Asked Questions

What is I-129 used for?

Form I-129 is used by an employer to petition for a beneficiary to come temporarily to the United States as a nonimmigrant to perform services or labor, or to receive training. It is filed with U.S. Citizenship and Immigration Services (USCIS).

What does I-129F approval mean?

The approval of Form I-129F by USCIS means that your application for a fiancé visa has been reviewed and accepted, indicating that the intended marriage is recognized. You will now need to follow any additional instructions provided by USCIS to proceed with obtaining the visa.

Is I-129 same as H-1B?

Form I-129 is the petition filed with USCIS by a prospective H-1B employer seeking approval to employ an H-1B worker. It is used for many non-immigrant petitions, including H-1B, O-1, TN, and E-3 extensions and change of status petitions.

Who can use Form I-129?

Form I-129 can be used by U.S. employers to petition for nonimmigrant workers in various employment classifications such as H-1B, H-2A, L-1, O-1, and more.

How can I avoid errors when filling out Form I-129?

To avoid errors when filling out Form I-129, make sure to complete the entire form accurately, use black ink, type or print legibly, and use “N/A” for non-applicable items. Additionally, submit legible copies of supporting documents in English, with certified translations for any foreign language documents.

Check USCIS Case Status Online | Quick Guide

Are you seeking to check your USCIS case status without the hassle of phone calls and in-person appointments? The USCIS online portal provides a seamless and convenient way to access your immigration case status. This blog post will guide you through the process of effortlessly checking your USCIS case status online, helping you stay informed and prepared throughout your immigration journey. To get started, simply check USCIS case status on the official website.

Key Takeaways

  • Navigate the USCIS online portal and set up a myUSCIS account to manage your immigration case.
  • Locate your 13-character receipt number to access information via the Case Status Online tool or myUSCIS dashboard.
  • Utilize alternative methods such as phone inquiries, mail correspondence, and in-person appointments for updates on processing times and delays.

Navigating The USCIS Online Portal

Person creating a myUSCIS account

The U.S. Citizenship and Immigration Services (USCIS), a part of the United States government, offers an online portal that aims to simplify your immigration process. From setting up your myUSCIS account to locating your receipt number and accessing your case information, we’ll cover everything you need to know to navigate the USCIS online portal like a pro.

Setting Up Your myUSCIS Account

Setting up a myUSCIS account is a key step in handling your immigration case online. Creating an account provides access to helpful tools and resources, enabling easy status checks and tracking for your application. Creating a myUSCIS account is easy! All you need is a valid email address. Sign up today to get started. You can even create an account from outside the U.S. to manage your case online and stay informed about your immigration status.

For comprehensive step-by-step instructions on creating an account and utilizing the myUSCIS portal for your immigration application, visit the USCIS website. The guide available on the website will assist you in setting up your account and make the most of the portal’s features.

Locating Your Receipt Number

Your USCIS receipt number is a unique 13-character identifier assigned to your immigration application or petition when filed with the United States government’s U.S. Citizenship and Immigration Services (USCIS) is a UnitedStates government agency. It is responsible for overseeing lawfulimmigration to the U.S. This number is necessary for keeping track of your USCIS case.

You can find your USCIS receipt number on your Form I-797, Notice of Action, or at the top of your receipt when you pay for a filing fee or biometric appointment. If you can’t locate your receipt number, you may log in to your USCIS account or contact the USCIS Contact Center for assistance. Keep your receipt number handy, as you’ll need it throughout the process of checking your USCIS case status online.

Accessing Your Case Information

Once you have your myUSCIS account set up and your receipt number in hand, you can easily access your case information. Your myUSCIS account provides access to your case’s current status, USCIS processing times, and any official notices sent by USCIS. Your application or petition decision will be available online, once it’s been approved. You can view the approval notice from your online account..

To view your case status, simply follow these steps:

  1. Navigate to the USCIS website.
  2. Access the Case Status Online tool.
  3. Enter your 13-character receipt number.
  4. Click on the ‘Check Status’ button.

The system will display the current immigration case status, helping you stay informed and up-to-date on your immigration journey.

Essential Steps To Check Your USCIS Case Status

Checking USCIS case status online

This post outlines the key steps to check your USCIS case status online, like using the online case status tool and viewing your status via the myUSCIS dashboard. Following these steps allows you to manage your immigration case effectively and make decisions about your future based on accurate information.

Using The Online Case Status Tool

The USCIS online case status tool is an incredibly useful resource for monitoring the progress of your immigration case. This tool provides up-to-date information on the last action taken on your case and any subsequent steps that may be required.

To check your case status using the online tool, simply follow these steps:

  1. Go to the Case Status Online landing page.
  2. Enter your receipt number, omitting dashes but including all other characters, such as asterisks if they appear on your notice as part of the receipt number.
  3. Click on the “Submit” button.

Using this tool helps you keep updated on your case’s progress and prepare for any future steps.

Checking Status via myUSCIS Dashboard

For a more personalized experience, you can check your case status through the myUSCIS dashboard. By logging in to your myUSCIS account and clicking on the “Case Status” tab, you can easily access your case information. This method gives you a complete view of your case status, keeping you updated and ready for any future steps.

To check your case status through the myUSCIS dashboard, follow these steps:

  1. Access the USCIS website at uscis.gov
  2. Locate the ‘Case Status Online’ tool
  3. Click on the tool to access the myUSCIS dashboard
  4. Input your 13-character receipt number
  5. The system will display your case status and provide any updates or next steps

This method helps you keep updated on your visa application status, ensuring you’re aware of any potential immigration benefit.

Alternative Ways To Inquire About Your Case

Person making a phone inquiry with USCIS Contact Center

While the online portal and myUSCIS dashboard offer convenient ways to check your case status, there are alternative methods for inquiring about your USCIS case. These include phone inquiries with the USCIS Contact Center, mail correspondence for case updates, and scheduling in-person appointments. Each method has its own benefits, and these methods will be discussed next.

Phone Inquiry With The USCIS Contact Center

If you prefer to inquire about your case status by phone, you can contact the USCIS Contact Center at 1-800-375-5283 (TTY 1-800-767-1833) for domestic inquiries or 212-620-3418 for international calls. When checking your case status by phone, be prepared to provide the following information:

  • Full name
  • Date of birth
  • Alien Registration Number (A-Number)
  • USCIS receipt number
  • Immigrant visa case number

The USCIS Contact Center offers communication in both English and Spanish and operates from Monday to Friday, 8am to 8pm Eastern Time. Additionally, there is an option for automated case status checking over the phone with USCIS, giving you another way to keep track of your case progress.

Mail Correspondence For Case Updates

If you prefer to inquire about your case status through mail correspondence, you can send a letter to USCIS including the following information:

  • Full name
  • Date of birth
  • Alien Registration Number (A-Number)
  • Application filing date
  • Receipt number

Including a photocopy of the receipt notice with the receipt number could simplify the inquiry process.

Upon submitting a mail correspondence to USCIS for case updates, you should await a response, monitor your USCIS online account for automatic updates, and utilize the USPS tracking number to track delivery. The precise procedure may depend on the nature of your case and the instructions provided by USCIS.

Scheduling An In-Person Appointment

Scheduling an in-person appointment with USCIS

In certain situations, such as when you require proof of your immigration status or need immigration documents, assistance in accessing your green card immigration benefits, or obtaining emergency travel documents, you may need to schedule an in-person appointment with USCIS.

To schedule an in-person appointment with USCIS, you can utilize the online appointment request form provided on the USCIS website or contact the USCIS Contact Center at 1-800-375-5283. By completing the necessary information and submitting the request, you can arrange an appointment at a USCIS field office. This method lets you discuss your case in person and obtain customized help.

Understanding Processing Times And Delays

USCIS processing times and delays can be a major concern for applicants. Grasping the factors that impact processing times and knowing how to manage delays in your case is important.

This section discusses the various factors impacting processing times and offers advice on managing delays in your immigration case.

What Influences USCIS Processing Times?

Several factors can influence USCIS processing times, such as:

  • Policy changes
  • Increases in application volume
  • Complexity of individual cases
  • Accuracy and completeness of the application
  • Availability of USCIS resources
  • Additional security or background checks that may be necessary

All of these factors can affect processing times.

Different types of immigration benefits may require fewer forms and have shorter processing times compared to others. Consulting the USCIS website or a qualified immigration attorney is necessary to obtain accurate and current information on processing times for specific application types. Processing times may also fluctuate seasonally and could be affected by factors like the number of applications received and the availability of resources.

Handling Delays In Your Case

Delays in the processing of USCIS cases can be caused by various factors, including:

  • Backlog in the system
  • Administrative errors
  • Requests for additional evidence
  • Security checks
  • Changes in immigration policies

Understanding these causes can help you better manage your expectations and prepare for any potential issues.

To tackle processing time delays, you can reach out to USCIS through their website or get in touch with the USCIS Contact Center. They provide information on how to check your case status and inquire about a case outside normal processing time. Staying proactive and informed aids in managing any delays and ensures a seamless immigration process.

Staying Updated With USCIS Notifications

Keeping up with USCIS notifications is essential for staying informed about your immigration case. Choosing email and text alerts and understanding the various types of notifications can ensure you have the latest information on your case and allows for timely action.

Opting For Email And Text Alerts

Receiving USCIS email and text alerts

To get email and text alerts from USCIS, you can fill Form G-1145 and request a text message and/or email when USCIS accepts your form. Additionally, you can visit your USCIS Account Settings and opt-in to have notifications sent via text, email, or both. This ensures you receive timely updates about your case status, enabling you to make informed decisions about your immigration process.

USCIS email and text alerts offer information regarding:

  • Online filing of Form I-90
  • Automated case alerts
  • Processing times
  • Evidence upload
  • Address updates
  • USPS Delivery Instructions

Keeping updated with these notifications, you can manage your immigration case effectively and be ready for any future steps.

Understanding USCIS Notifications

USCIS sends a variety of notifications, including:

  • Receipt notices
  • Rejection notices
  • Transfer notices
  • Fingerprint biometric notices
  • Interview notices
  • Rescheduled notices

Understanding the various types of notifications and what they mean allows you to manage your immigration case better and take suitable actions based on the provided information.

To better understand the terminology used in USCIS notifications, refer to the online dictionary (glossary) provided on the USCIS website. The glossary offers definitions and explanations for various immigration-related topics, helping you decipher the information presented in USCIS notifications. You can access the glossary at https://www.uscis.gov/tools/glossary.

Summary

In summary, checking your USCIS case status online has never been easier. By following the guidance provided in this blog post, you can effortlessly navigate the USCIS online portal, stay informed about your case, and take necessary actions in a timely manner. Keep these tips in mind as you embark on your immigration journey, and face the future with confidence and clarity.

Frequently Asked Questions

How do I check my USCIS case status?

To check your USCIS case status, you can call the USCIS Contact Center at 800-375-5283 or visit USCIS’ “Case Status Online” tracker to enter your receipt number. You can also use the case status online tool on USCIS.gov, or contact their National Customer Service Center.

How do I know if my I 130 is approved?

Once you have filed your I-130 petition, you will receive a Form I-797C from USCIS. This will let you know if the petition has been approved or rejected, or whether more information is needed. If the petition is approved, your relative may apply for either a Green Card or immigrant visa depending on the criteria.

What happens after I 134A is approved?

Upon approval of Form I-134A, USCIS will notify beneficiaries with instructions for creating an online account and further next steps.

How do I create a myUSCIS account?

Visit the USCIS website and follow the instructions to create a myUSCIS account; you only need a valid email address.

Where can I find my USCIS receipt number?

Your USCIS receipt number can be found on your Form I-797, Notice of Action, or at the top of your receipt when you pay for a filing fee or biometric appointment.

USCIS Visa Appointment India: Scheduling And Preparation

Imagine the excitement of planning your dream trip to the United States, only to find yourself overwhelmed by the complex visa application process. Navigating the intricacies of USCIS visa appointment India can be challenging, but fear not! This comprehensive guide will walk you through every step, from initiating your application to preparing for your visa interview, ensuring a smooth and stress-free experience.

By understanding the USCIS visa appointment India system and following the tips provided, you’ll be well on your way to securing your visa and embarking on your much-anticipated journey. So, let’s dive into the world of USCIS visa appointment India and make your dream trip a reality!

Key Takeaways

  • Understand the process for USCIS visa appointments in India to ensure a successful application.
  • Pay the non-refundable fee, complete forms accurately and provide evidence of strong ties to home country.
  • Track progress of application regularly and be aware of special considerations for certain visas.

Understanding USCIS Visa Appointments In India

USCIS visa appointments in India involve processing various types of visas, ranging from business travelers and tourists to future spouses. Setting up a visa appointment is necessary for an accurate and speedy visa application process. Having the right documents and information ready can result in a successful visa application rather than a disheartening denial.

The application process for US tourist visas for Indian citizens includes the following steps:

  1. Complete the DS-160 form.
  2. Pay the non-refundable application fee.
  3. Create an account with the Visa Information Service.
  4. Select a preferred US visa application center.
  5. Secure an interview slot at the embassy or consulate.
  6. Prepare the required documents for the visa interview.

Types Of Visas Processed By USCIS

The United States Citizenship and Immigration Services (USCIS) processes various types of non immigrant visas, such as tourist, business, and transit visas. The US B2 tourist visa, for example, is a nonimmigrant visa issued to individuals seeking to enter the US for a temporary period of time. It can be valid for up to 10 years and allows a maximum stay of 180 days per visit.

A transit visa, such as the C1 visa, permits travelers to enter the US for a layover before proceeding to their final destination. The C1 visa is valid for a maximum of 29 days or until the date of departure from the US, whichever occurs first.

The Importance Of Scheduling An Appointment

Arranging a visa appointment is key to a successful application, allowing you to:

  • Establish a specific meeting date and time with the consular officer
  • Present your documents
  • Respond to queries
  • Offer any supplementary details necessary for your visa application

Without scheduling an appointment, you may not be able to proceed with the application process.

In some instances, arranging a medical examination before a visa appointment is required to verify that visa applicants meet the standards set by the United States Public Health Service. It’s advisable to schedule the medical exam upon receiving your appointment date.

Initiating Your Visa Application

Completing the DS-160 Form for US Visa Application

Before submitting a US visa application in India, the visa process involves several steps:

  1. Pay the visa fee.
  2. Complete the DS-160 form, which is the US visa application form required by the Department of State.
  3. After receipt of the appointment letter, register electronically.
  4. Arrange a biometrics appointment.

The visa application ID, which is utilized throughout the visa application process, is an essential piece of information required for successful application submission.

Completing The DS-160 Form

The DS-160 form is an online application for a US visa and can be completed through the Consular Electronic Application Center. This form requires the following information:

  • Travel details
  • Companion details (if applicable)
  • Previous US travel details (if applicable)
  • Address and contact information
  • Work or educational details
  • Security and background information

After completing theDS-160 form, it’s recommended to review the application to ensure all the information is accurate. Additionally, print a copy of the completed form for your personal records. The Application ID number may be required for subsequent steps of the application process.

Paying The Non-Refundable Application Fee

The non-refundable application fee for a US visa in India is $205 for certain petition-based nonimmigrant visas for temporary workers in the H, L, O, P, Q, and R categories. You can pay the US tourist visa fees in India using various methods, such as:

  • Demand Draft
  • Credit/debit card
  • Cash
  • National Electronic Funds Transfer (NEFT)

Paying the US visa application fee online in India prior to the visa appointment is necessary. The receipt for payment of the Machine-Readable Visa (MRV) fee serves as evidence of payment required for the US visa application fee in India.

Booking Your USCIS Visa Appointment

Booking USCIS Visa Appointment in India

To arrange a US visa appointment in India, you need to furnish details like the visa fee deposit reference number, the barcode number on the DS-160 confirmation page, visa type, personal data, any dependents, document delivery location, and the visa payment. Two appointments are required: one for submitting biometric information at a Visa Application Center (VAC) and another for the visa interview at the embassy or consulate.

The US VAC in India has a specific purpose. It collects biometric data, photos and fingerprints of visa applicants before they submit them to the consular section. Be prepared to present your passport and appointment letter at your US visa interview at the US Embassy or Consulate in India.

Creating An Account With The Visa Information Service

To create an account with the Visa Information Service for scheduling US visa appointments, you must follow these steps:

  1. Register and create a profile online.
  2. Access the official website of the Visa Information Service.
  3. Follow the instructions provided to create your account.

Completion of the DS-160 form is required before setting up an account with the Visa Information Service. The information provided in the form will be used to schedule your US visa appointment.

Selecting Your Preferred US Visa Application Center

When selecting a preferred US Visa Application Center in India, consider factors such as:

  • Location
  • Appointment availability
  • Processing time
  • Facilities and services
  • Reputation
  • Additional services

The chosen US Visa Application Center in India may influence visa processing time, so consult the specific wait times and processing information provided by the US embassy or consulate in India for more precise information.

All US Visa Application Centers in India are equipped to process all types of visas, ensuring a consistent level of service across the centers.

Securing Your Interview Slot At The Embassy Or Consulate

It’s advised to arrange your US visa interview in India at the earliest opportunity. The wait time for an interview appointment may vary depending on the workload and staffing at the embassy or consulate. Consult the estimated wait time on the official website and arrange your appointment accordingly.

Keep in mind that the US Embassy in India does not permit walk-ins for visa interviews. Visa interviews are conducted strictly by appointment, so make sure you secure your interview slot in advance.

Preparing For Your Visa Interview

Preparing for US Visa Interview

The visa interview is a key part of the application process, and meticulous preparation can notably enhance your chances of success. From compiling a comprehensive document checklist to understanding what to expect during the interview, being well-prepared will give you the confidence to navigate this crucial stage of your visa application journey.

Individuals aged between 14 and 79 are typically required to attend a visa interview. During the interview, the consular officer will assess your eligibility to acquire a visa. To ensure a successful visa application, it is imperative that all information provided on the forms is accurate, and that you demonstrate strong ties to your home country.

Document Checklist For The Visa Interview

Possessing a detailed checklist of necessary documents for the visa interview is required for a seamless and successful application process. Some common documents required include:

  • A valid passport
  • The DS-160 confirmation page
  • Evidence of financial capability to cover the trip expenses
  • A letter of invitation or support from a sponsor (if applicable)
  • Evidence of ties to the home country
  • Travel itinerary or flight reservation
  • Evidence of accommodation arrangements

Additionally, you may need to provide employment or education-related documents such as an employment letter, pay stubs, or enrollment letter. Remember that the specific documents required may vary depending on the visa type and individual circumstances, so consult the official website of the U.S. Embassy or Consulate in your country for the most accurate and up-to-date information.

What To Expect During The Visa Interview

The visa interview process involves a consular officer interviewing the applicant and any accompanying family members to assess their eligibility to receive a visa. Questions pertaining to travel plans, the purpose of the visit, and other relevant information may be asked. It’s important to dress professionally and be well-prepared for the interview.

The purpose of the consulate officer during a US visa interview is to assess the eligibility and credibility of the visa applicant. They evaluate the applicant’s intentions, ties to their home country, and ability to support themselves financially during their stay in the US. The officer’s objective is to determine if the applicant meets the requirements for the visa category they are applying for.

After The Visa Interview

Upon completion of your visa interview, you will receive notification about the result of your US visa application. If your application does not require additional administrative review, and your visa is approved, it will take three to four days for the visa to be issued. It’s crucial to stay informed of the status of your visa application and understand the different stages of the process.

This section will cover administrative processing and its potential effects on your visa application processing time. We’ll also provide guidance on tracking your visa application status after the interview.

Understanding Administrative Processing

Administrative processing serves as an extra review stage that might be needed for some visa applications. During this stage, the consular officer may request further information or documentation, conduct additional security checks, or schedule another interview. Administrative processing can have a considerable impact on the overall visa application timeline, as there is no set timeline for this process, and it can range from months to years, depending on the case.

To reduce the likelihood of your visa application undergoing administrative processing, accurately proving that you fulfill all the criteria for your visa category is required. This includes providing all the necessary documentation and evidence to support your application.

Tracking Your Visa Application Status

You can track the progress of your US visa application online through the USCIS website or by contacting the USCIS directly via telephone or email. The processing time for your visa application may vary depending on factors such as the type of visa, the workload of the processing center, and any additional processing requirements. It is advisable to frequently check the USCIS website or contact the embassy or consulate for the most recent information concerning the status of your visa application.

An “administrative processing” status in relation to a US visa application signifies that the application requires further investigation or assessment by a consular officer before a final decision can be made. This can include additional security checks, verification of documents, or additional interviews. The administrative processing status can cause delays in the visa application process, and the duration can vary depending on the particular case.

Special Considerations For Certain Visa Types

Some visa types have unique requirements or considerations. For example, transit visas and multiple entry visas have specific application processes and benefits that are worth understanding when applying for a US visa. This section will cover the prerequisites and application procedures for transit visas and multiple entry visas.

Understanding these special considerations can help you navigate the visa application process more efficiently and increase your chances of obtaining the appropriate visa for your needs.

Transit Visa Requirements

If your layover in India exceeds 24 hours or you need to clear immigration, even if the layover time is less than 24 hours, you’ll need to obtain a transit visa. If you meet all the required criteria, such as having a layover time of less than 24 hours, a confirmed onward ticket, and remaining in the designated transit area of the airport, you may be able to transit through India without a visa.

Transit visas in India typically have a validity period of 15 days. It’s always a good idea to consult the Indian embassy or consulate for the most up-to-date information on transit visa requirements and validity periods.

Applying For Multiple Entry Visas

A multiple entry visa allows you to travel to the United States multiple times without having to reapply for a visa, providing more flexibility and convenience in your travel arrangements. To apply for a multiple entry visa, you’ll need to follow the standard application process, which includes submitting the necessary documents, paying the required fees, and attending the visa interview.

Having a multiple entry visa can be advantageous, as it affords you the freedom to explore the US and return to your home country multiple times without the hassle of applying for a new visa each time. This can save you time, money, and stress during your travels.

Tips For A Successful Visa Application

A triumphant visa application necessitates meticulous preparation and a keen eye for detail. Ensuring that all information provided on the forms is accurate and that you demonstrate strong ties to your home country can greatly improve your chances of a successful application.

This section will offer tips on verifying the precision of information on forms and building solid connections to your home country during the visa interview process. By following these tips, you’ll be well on your way to a smooth and successful visa application process.

Accuracy Of Information On Forms

Supplying correct details on USCIS visa application forms is critical, as incorrect or false information can result in delays, rejections, or potential legal repercussions. Common errors on USCIS visa application forms include:

  • Incomplete or incorrect information
  • Forgotten signatures
  • Using outdated forms
  • Hiding any alterations made on the form

To confirm the accuracy of the information you supply on USCIS visa application forms, you can:

  • Submit supporting documents
  • Undergo biometric verification
  • Establish a USCIS online account
  • Utilize the SAVE Program for immigration status verification.

Strong Ties To Home Country

During US visa interview, showcasing solid connections to your home country can significantly enhance your probability of a successful application. Examples of strong ties include:

  • Proof of property or significant assets in your home country
  • Employment contracts or pay stubs
  • Connections with family and friends
  • Community involvement
  • Possession of valuable possessions

Other ways to demonstrate strong ties to your home country during the visa interview include providing evidence of a stable job or business, ongoing education or professional development, and active participation in community or social organizations.

Summary

Navigating the USCIS visa appointment process in India can be challenging, but with the right guidance, you can successfully secure your visa and embark on your dream trip to the United States. By following the steps outlined in this comprehensive guide, from initiating your application to preparing for your visa interview, you’ll be well-equipped to handle the complexities of the visa application process.

Remember, thorough preparation and attention to detail are key factors in ensuring a successful visa application. Keep these tips in mind as you embark on your journey, and before you know it, you’ll be exploring the wonders of the United States with confidence and ease.

Frequently Asked Questions

Are new US visa appointments open in India?

US visa appointments are open in India, though availability may be limited based on local conditions and operational capacity. You can apply for an interview at whichever location is most convenient.

How long is the wait for US visa appointment in India?

The wait for US visa appointment in India currently ranges between 6 and 10 weeks.

What is the USCIS visa appointment process in India?

The USCIS visa appointment process in India involves scheduling an appointment, submitting the necessary documents, completing the DS-160 form, paying the non-refundable application fee, and attending the visa interview at the embassy or consulate.

How can I track the status of my visa application?

You can track the progress of your US visa application online through the USCIS website or by contacting them directly.

What types of visas are processed by USCIS?

USCIS processes a variety of visas, including tourist, business, and transit visas.

Renewing US Visa: Guide To A Smooth Process

The desire to extend your stay in the United States, whether it’s for work, study, or leisure, often necessitates renewing your US visa. While the thought of going through this process might initially seem overwhelming, understanding the ins and outs of renewing US visa can help you navigate it with ease. This comprehensive guide will cover everything you need to know about renewing US visa, from eligibility criteria to the interview waiver program.

By following the step-by-step instructions provided in this guide, you’ll gain a clear understanding of the renewing US visa process along with valuable insights on how to overcome potential setbacks. Let’s begin this journey towards a seamless visa renewal experience.

Key Takeaways

  • Understand US visa renewal eligibility criteria and types of visas eligible for renewal.
  • Complete Form DS-160, gather necessary documents and potentially arrange an interview. Check Visa Interview Waiver Program to see if it applies.
  • Pay applicable fees, check application status regularly & understand what to expect after approval or denial of a US visa renewal.

Understanding US Visa Renewal Eligibility

Renewing US visa eligibility criteria

In the context of US visa renewal, the initial step is to ascertain your eligibility. The eligibility criteria vary depending on the type of visa you hold and its expiration date. Knowing these factors will ensure that you’re well-prepared for the renewal process, minimizing any disruptions to your plans.

To gain a better understanding of eligibility, we will examine the various types of visas that qualify for renewal, their specific requirements, and the significance of expiration dates and visa validity.

Types Of Visas Eligible For Renewal

Since not all visas qualify for renewal, identifying those that can be extended is imperative. Among the various visa types that can be renewed are visitor visas (B1/B2) and diplomatic visas. The renewal process for a visitor visa typically involves completing the online nonimmigrant visa application form, submitting the required fee, and scheduling an appointment for those with a valid visa.

Various visas carry unique renewal requirements. For instance, renewing a US tourist visa necessitates visiting a US embassy or consulate abroad, arranging an interview with a visa official, and submitting the required paperwork. Be sure to familiarize yourself with the precise renewal requirements for your particular visa type to ensure a smooth experience.

Expiration Date And Validity

Prior to seeking visa renewal, checking the expiration date and validity of your visa is a requisite step. The expiration date refers to the last day you can use your visa to enter the United States, while validity pertains to the duration of time you’re authorized to remain in the country, starting from the date of visa issuance. A US visa can be renewed after it has expired, provided that it remains valid or has expired within the past 48 months.

To ensure a successful renewal process, it’s advisable to initiate the procedure no later than six months before your visa’s expiration date. By verifying your visa’s expiration date and validity, you’ll be well-prepared for a seamless renewal experience.

The US Visa Renewal Process

US visa renewal process overview

Having ascertained your eligibility for visa renewal, you can now proceed with the actual visa application process. This process is similar to your initial visa application, involving the completion of an application form, payment of the required fee, and scheduling an appointment if necessary.

We will examine the key facets of the US visa renewal process, which include filling out Form DS-160, collecting necessary documents, and arranging an interview if needed.

Completing Form DS-160

Form DS-160 is the application form required for obtaining US visas and US visa renewals. It can be completed through the Consular Electronic Application Center, and it must be filled out exclusively in English, using only English language characters. The confirmation page for Form DS-160 is of paramount importance, as it should be printed and brought to the interview and when submitting documents.

Accuracy is crucial when completing Form DS-160, as any errors or inconsistencies may lead to delays or even denials in the visa renewal process. Ensure that you provide truthful and up-to-date information to increase your chances of a smooth renewal.

Gathering Supporting Documents

During your US visa renewal, it’s important to collect all required supporting documents. These documents may vary depending on your visa type, but some common examples include:

  • A valid passport
  • Evidence of qualifications or degrees
  • Evidence of income or assets
  • Travel itinerary
  • Birth or marriage certificates

It’s crucial to check the specific requirements for your visa type to guarantee that you have all the required documents for the renewal process. Having all the necessary documents in order will not only expedite the process but also minimize the risk of visa denial.

Scheduling An Interview (if applicable)

In some cases, when renewing a US visa, an interview is required. To schedule an interview, you’ll need to:

  1. Complete the DS-160 form
  2. Pay the visa application fee
  3. Create an account on the U.S. Visa Information Service website
  4. Schedule the interview appointment through the online system

However, certain applicants may qualify for the Visa Interview Waiver Program, which allows for visa renewals without an in-person interview at the US Embassy.

The interview process can be a critical aspect of the US visa renewal process. Understanding the Visa Interview Waiver Program’s eligibility requirements and application process can help you determine if you need to schedule an interview and how to prepare for it if necessary.

Visa Interview Waiver Program

For some applicants, the Visa Interview Waiver Program offers a more convenient path to renewing their US visa. This program allows certain visa renewals to be processed without an interview, simplifying the renewal process and potentially saving valuable time and resources.

To fully comprehend the benefits of the Visa Interview Waiver Program, let’s explore its eligibility requirements and application process, which can help determine if you qualify for this convenient renewal option.

Eligibility Requirements

Several criteria must be met to qualify for the Visa Interview Waiver Program. Visas of the following categories are eligible for the program:

  • B-1/B-2
  • C-1/D
  • F
  • J
  • M
  • O

Additionally, applicants renewing a visa in the same classification within 48 months of the prior visa’s expiration are eligible for an interview waiver.

Knowing whether you meet the criteria for the Visa Interview Waiver Program can simplify your visa renewal process and potentially save you time and effort. Ensure that you carefully assess your eligibility before proceeding with the renewal process.

Application Process

If you’re eligible for the Visa Interview Waiver Program, the application process becomes more streamlined. Eligible applicants are only required to submit Form DS-160, pay the related filing fees, and await the processing of their application. The processing duration for the Interview Waiver Program is estimated to be four to six weeks from the time the application is received by the Consular Section.

By taking advantage of the Visa Interview Waiver Program, you can navigate the US visa renewal process with increased efficiency and minimal stress, especially if you have a visa prior. With our streamlined visa processing, you can focus on preparing for your visa interview and interview waiver with ease.

Paying The US Visa Renewal Fee

Paying US visa renewal fee

An essential aspect of the US visa renewal process is remitting the appropriate fees. The fees for visa renewal vary depending on the type of visa, and it’s crucial to understand the fee structure to ensure a hassle-free renewal experience.

Let’s explore the different fees associated with US visa renewal and the various payment methods available to submit these fees.

Fee Structure

Different types of visas come with distinct fees for renewal. For example, the renewal fee for a B-1/B-2 tourist visa is $185, while the fee for certain petition-based nonimmigrant categories (H, L, O, P, Q, and R) is currently $205. It’s essential to be aware of the specific fees for your visa type to ensure accurate payment.

In some cases, visa fee waivers may be available for those unable to pay the filing fees, and certain nonimmigrant visa applicants may benefit from interview waiver authorities, which can reduce visa appointment wait times.

Payment Methods

Many payment methods are accepted for the US visa renewal fee, such as:

  • Visa
  • MasterCard
  • American Express
  • Discover

You can remit the fees online through the Consular Electronic Application Center, ensuring that your card has sufficient funds to cover the fee.

By understanding the various payment methods available, you’ll be well-equipped to handle the financial aspect of your US visa renewal process without any complications.

US Visa Renewal Processing Time

US visa renewal processing time

US visa renewal processing times can fluctuate, and recognizing the factors that might influence the process duration is important. Being aware of these factors can help you plan accordingly and minimize any potential disruptions to your travel plans.

We will examine the elements that can influence the processing time of your US visa renewal and learn the procedure to check your application status.

Factors Affecting Processing Time

Several factors can influence the processing time of a US visa renewal. These factors include:

  • Pent-up demand
  • Regular seasonal demand
  • Typical causes for visa denials
  • The type of visa
  • Time of the year

Different visa types, including multiple entry visa, may have distinct processing times due to differing requirements, eligibility criteria, and workload.

Furthermore, backlogs at the consulate or embassy can cause extended wait times and delays in the processing of visa renewal applications. Being aware of these factors can help you better anticipate the processing time for your visa renewal and make necessary adjustments to your plans.

Checking Application Status

To check the status of your US visa renewal application, you’ll need your passport number, your immigrant or nonimmigrant visa application type, and your receipt number (if applicable). You can use the U.S. Department of State’s Visa Status Check portal or the Consular Electronic Application Center (CEAC) website to review your visa application status online.

Additionally, you may inquire about the status of your US visa renewal application via phone by contacting the USCIS National Customer Service Center, which is part of the Citizenship and Immigration Services. Keeping track of your application status will provide you with valuable insight into the progress of your visa renewal and allow you to be prepared for any potential disruptions.

What To Expect After Visa Renewal Approval

Upon approval of your US visa renewal, you will receive your renewed visa, which permits continued travel to the United States. The validity period of a renewed US visa can vary from 1 month to 10 years, depending on the type of visa. In some cases, there may be conditions attached to a renewed US visa, such as having a valid passport for at least six months prior to the intended departure date.

Upon receiving your renewed visa, you can utilize it immediately for travel, ensuring a seamless continuation of your journey in the United States.

Handling US Visa Renewal Denials

In case of a US visa renewal denial, comprehending the reasons for the denial and potential subsequent steps is important. Common causes of visa renewal denials include incomplete or inaccurate information on the application form and inadequate supporting documentation.

If your visa renewal is denied, you can take several steps to address the issue, including:

  1. Reviewing the denial letter
  2. Understanding the reason for denial
  3. Obtaining legal advice
  4. Reapplying or appealing
  5. Supplying additional information

By taking appropriate action, you can potentially overcome the denial and successfully renew your US visa.

Summary

Navigating the US visa renewal process can be a daunting task, but with the right knowledge and understanding of the process, you can ensure a smooth experience. This comprehensive guide has covered everything from eligibility criteria and the renewal process to handling denials and understanding processing times.

By following the steps and insights outlined in this guide, you’ll be well-equipped to successfully renew your US visa, allowing you to continue your journey in the United States with confidence and peace of mind.

Frequently Asked Questions

Do I have to renew my U.S. visa before it expires?

You need to renew your U.S. visa before it expires, as the expiry date stamped on the visa is different from that on your passport. It is recommended you apply for a new visa well in advance of your current visa’s expiration date.

How do I renew my U.S. visa online?

To renew your U.S. visa online, you must complete Form DS-160 (Online Nonimmigrant Visa Application) and upload a digital visa photo, pay the filing fees, then schedule and attend an interview at a U.S. Embassy or consulate.

Can I renew my U.S. visa without interview?

You may be eligible to renew your U.S. visa without an interview through the Interview Waiver Program (IWP), depending on your individual eligibility. This program allows certain types of visa holders, including some B visa holders, to renew their visa without attending an additional visa interview.

What types of visas are eligible for renewal?

Visitor visas (B1/B2) and diplomatic visas are eligible for renewal.

How can I check the status of my US visa renewal application?

To check the status of your visa renewal application, you can utilize the U.S. Department of State’s Visa Status Check portal or the Consular Electronic Application Center (CEAC) website.

Visa Wait Times in 2023: Tips for Quicker US Visa Approval

Navigating the complex world of US visa wait times can be a challenging yet rewarding endeavor. With a keen understanding of the intricacies involved in the visa application process and a strategic approach, you can optimize your experience and secure a US visa with minimal delays. This comprehensive guide will equip you with the knowledge and tools to navigate visa wait times in 2023, providing insights into various visa categories, regional breakdowns, and expert advice from the consular team.

Key Takeaways

  • Navigate current US visa appointment wait times by referring to the State Department website.
  • Utilize online applications and services, consider an immigration lawyer, or apply for a Visa Interview Waiver Program to reduce your wait time.
  • Understand administrative processing requirements and prepare thoroughly for interviews with consular officers in order to increase chances of success.

Navigating Current US Visa Appointment Wait Times

Visa applicants waiting in line at the embassy

In recent times, visa appointment wait times have been a concern for many visa applicants. For instance, in India, the wait time for non-immigrant visa categories, excluding first-time visitor visa applicants, is close to pre-pandemic levels or even less. However, travelers who do not necessitate an interview, such as interview required visitors, experience exceedingly low wait times. The wait time for B1/B2 non-immigrant visitor visa appointments in various cities in India ranges between 506 days and 596 days, which is a significant wait time compared to visa applicants worldwide.

To stay updated with the latest US visa appointment wait times for India, you can refer to the US State Department visa wait times website, which is a part of the consular affairs website. The wait time for H-1B visas, F1 visas, and other non-immigrant workers can range between two days and ninety days. Measures have been taken to reduce the visa application backlog and respond to increasing demand. This has included permitting Indian applicants to submit their U.S. visa applications at U.S. consulates located outside of India, like the one in Bangkok. The wait times at these consulates tend to be significantly shorter than those inside India.

Understanding Visa Categories

The two main types of US visas are immigrant visas and nonimmigrant visas, which include petition-based temporary workers. The wait time for a nonimmigrant visa interview appointment depends on various factors such as workload, staffing, and factors like a busy weekend. The current wait times for US immigrant visas, including based temporary workers H, can vary depending on the specific visa category and individual circumstances.

You should become familiar with the estimated wait time for a nonimmigrant visa interview appointment as shown on the U.S. Department of State’s website and the U.S. Embassy or Consulate websites. These platforms provide information on various visa types, including transit C, D, and transit C D C1 visas. The US visa appointment wait time data is updated on a weekly basis, based on actual incoming data, including crew and transit C visa applications.

Checking The Latest Data

Monitoring the most recent data on visa wait times aids in effectively planning your visa application process. The US embassy offers insights on visa appointment wait times, and the estimated wait time to acquire an interview appointment at a U.S. Embassy or Consulate can fluctuate weekly based on actual incoming applications. By keeping track of the visa wait time, you can better prepare for your application. The US Department of State reports visa appointment wait times on their official website, including wait times for:

  • H visas
  • L visas
  • O visas
  • P visas

Bear in mind that the wait time for a visa appointment can vary based on the location and time of year. To get the most accurate and up-to-date information, make sure to check the last week’s data on the US Department of State’s website or the respective U.S. Embassy or Consulate website for your country.

Streamlining Your Visa Process

Streamlining your visa application process can significantly improve your chances of success. The documents necessary for a US visa application may vary depending on the type of visa being applied for, such as exchange visitors F visas. Utilizing an online application for a US visa can expedite the process for various visa types, including interview waiver visitors.

To sidestep common hurdles in the US visa application process, like errors in form completion, incorrect or incomplete information, missed deadlines, incorrect visa application, and lack of detail, you should be attentive and meticulous. The US Department of State’s Visa Wizard tool facilitates the streamlining of the visa process for various visa types, including temporary workers h l, as well as the h l o p category.

Strategies To Reduce Your Wait

Implementing strategies to reduce the US visa appointment wait time can make a significant difference in your overall experience. Some strategies to consider include:

  • Scheduling exclusive interviews for first-time applicants, including visitors F, M, and J visas, to help expedite the process.
  • Although rescheduling a US visa interview is possible if you have missed your previously scheduled appointment, it does not necessarily shorten the wait time for a visa interview.
  • The wait time for visa appointments can vary and is dependent on actual incoming applications.

Another way to expedite the US visa process is by hiring an immigration lawyer, even for interview required crew visas. There are also online platforms and services available that can facilitate the US visa appointment process, including for transit C, D, and C1 visas.

Preparing For The Interview Waiver Program

The Interview Waiver Program permits qualified applicants, such as interview waiver visitors, to submit their passport and the necessary documents to a U.S. embassy or consulate without an interview. To be eligible for the Interview Waiver Program, applicants must possess nationality or residency in the country in which they are submitting their application, including crew and transit C visa applicants.

To apply for the US Visa Interview Waiver Program, you must fulfill certain requirements, such as for exchange visitors F visas. You can find further information and assess your eligibility on the official website of the U.S. Department of State.

The advantages of the US Visa Interview Waiver Program include decreased visa appointment waiting times and more efficient visa processing.

Regional Breakdown Of US Embassy And Consulate Wait Times

Regional breakdown of US Embassy and Consulate wait times

A regional analysis of US Embassy and Consulate wait times for nonimmigrant visa interview appointments and expedited appointments is key to comprehend the wait times in various countries. For instance, applicants are expected to experience a longer-than-normal wait time for nonimmigrant visa interview appointments at the US Embassy in Mexico, including temporary worker’s H and L visas. There are also disparities in wait times between US Embassies and Consulates in Europe.

In Asia, the wait time for nonimmigrant visa interview appointments varies according to the country. It is advisable to consult the official website of the U.S. Embassy or Consulate in the respective country for the most current information.

Nonimmigrant Visa Interview Appointment

Average wait times for nonimmigrant visa interview appointments in India

The current average wait times for Nonimmigrant Visa interview appointments in different regions of India can vary, but in some cities, the wait time is approximately two years. Nevertheless, it is feasible to acquire a US visa appointment in a span of one week by applying from another country. The global median wait time for a tourist visa (B1/B2) interview appointment is less than two months.

Factors influencing the wait time for a Nonimmigrant Visa interview appointment in India encompass:

  • Current visa demand
  • Availability of appointment slots at the U.S. Embassy or Consulate
  • Any staffing increases or efforts to shorten wait times by the U.S. Mission to India

Regularly checking the ‘Wait Times for a Nonimmigrant Visa to be Processed’ statistics on the US Embassy website is key, as these figures alter weekly based on actual incoming applications.

U.S. to reduce Visa delays takes steps to increase staff strength and opens new consulates in India.

Expedited Appointments For Urgent Travel

Expedited appointments for urgent travel are available in case of an unanticipated funeral, medical emergency, or school start date. Before petitioning for an expedited nonimmigrant visa interview appointment, there are a few steps you must take. First, submit the online visa application form (DS-160). Then, pay the application fee. Finally, schedule the first available interview appointment..

Under normal conditions, the average wait time for expedited nonimmigrant visa interview appointments in the US is approximately two to three weeks. To substantiate the requirement for an expedited nonimmigrant visa interview appointment, you may need to furnish documents that demonstrate an immediate need for expedited processing, such as evidence of medical emergencies, urgent business travel, or humanitarian reasons.

Administrative Processing: What to Expect

Administrative processing is a customary procedure conducted by the US Department of State to guarantee the security and integrity of the visa process. Some refused visa applications may necessitate administrative processing, and its duration is contingent upon individual circumstances. The consular officer will either grant or deny the visa.

Administrative processing may involve the consular officer requesting additional documents or information, conducting background checks, or obtaining clearance from other government agencies. The duration of administrative processing can vary depending on the individual case and the complexity of the matters involved. It should be noted that administrative processing does not necessarily indicate a visa denial, but it may result in a delay in the visa issuance.

It is advised that visa applicants submit their applications in a timely manner, prior to their planned date of travel.

Insights From The Consular Team

Consular officers advise that applicants be well-prepared, arrive early, dress appropriately, be honest and consistent, be concise and clear, and explain their intentions clearly during the interview in order to have a successful US visa application. To avert typical errors in the US visa application process, such as:

  • Form completion mistakes
  • Missing or incomplete documents and information
  • Lack of preparation for the visa interview
  • Inappropriate dress
  • Furnishing incomplete or inaccurate information
  • Appearing uneasy or lacking confidence
  • Tardiness
  • Negative attitude
  • Failure to showcase strong ties to one’s home country

Being careful and detailed is key.

During the US visa interview, consular officers typically inquire about the following:

  • The rationale for your journey to the US
  • Your past travel experiences
  • Your connections to your homeland
  • Your intentions while in the US

Being well-prepared, truthful, confident, and explaining your intentions clearly can help make a favorable impression on a consular officer.

Summary

In conclusion, understanding US visa wait times, various visa categories, and regional breakdowns is essential for a successful visa application. By streamlining your visa process, implementing strategies to reduce your wait time, and being well-prepared for the Interview Waiver Program, you can optimize your experience and secure a US visa with minimal delays. Remember to stay updated with the latest data on visa wait times, consult the consular team for insights, and stay vigilant throughout the process to ensure a smooth journey towards your US visa approval.

Frequently Asked Questions

How long are visas taking right now?

Visa processing times are currently estimated to take 3 to 5 weeks from the date of completing the application and embassy interview. After this period, applicants should receive a response on whether their visa has been approved or denied.

Why is US visa processing taking so long?

Processing times for US visa applications have increased due to the backlog of cases accumulated during COVID-19 restrictions and a growing demand. This has resulted in extended wait times for U.S. visa interview appointments in some locations, with an astonishing 247 days on average wait time for tourist or business travel visas compared to a benchmark of 17 days before COVID.

What is the Interview Waiver Program, and who is eligible?

The Interview Waiver Program allows qualified applicants to apply for a passport and other documents without an interview, provided they are of certain nationality or reside in the country of application.

What factors do consular officers consider when evaluating a US visa applicant?

Consular officers evaluate US visa applicants based on factors such as purpose of travel, connections to the home country, financial security, travel history, criminal record, and documentation to determine eligibility.

How can I stay updated with the latest data on visa wait times?

Stay up to date on visa wait times by referring to the US State Department website and respective U.S. Embassy or Consulate websites for the most accurate information.

Letter of Invitation US Visa: A Step-by-Step Guide

Inviting a friend or family member from another country to visit you in the United States can be an incredible, enriching experience. However, navigating the visa application process can feel overwhelming. Fear not, this comprehensive guide will walk you through the steps to create a compelling letter of invitation US visa, ensuring that your loved one has the best chance of obtaining their visa and making unforgettable memories together.

Key Takeaways

  • A visa invitation letter is a formal document required to demonstrate the connection between the host and applicant.
  • The letter must include comprehensive details of both visitor’s personal and travel specifics, as well as evidence of financial capability from the host.
  • Before submitting an invitation letter, review content and documents included for accuracy to increase chances of successful application.

Decoding The Letter Of Invitation For A US Visa

A visa invitation letter serves as a formal document, composed by a US legal resident or citizen, inviting their foreign relative to visit them in the United States. It helps the U.S. embassy or consular officer gain an understanding of the connection between the applicant and the host, as well as the intent of the visit. Invitation letters are typically required for tourist visas or other temporary visas such as B-1, and can boost the chances of obtaining a visa by 27%. Friends or family residing in the United States can provide a sample invitation letter for a US visa.

In the invitation letter, the host must demonstrate the connection between them and the guest, as well as the ability to finance the entirety of the guest’s stay in the United States through a visa sponsorship letter. The applicant must also demonstrate means of subsistence, provide evidence of strong ties to their home country, and complete the application process for a US visa in order to be eligible for a visa. The visitor’s address should be included in the visa invitation letter.

Crafting Your Invitation Letter: Key Components

Illustration of a pen and a paper with the heading 'Crafting Your Invitation Letter: Key Components' for a US visa invitation letter

A US visa invitation letter should encompass the following vital elements:

  • Contact information
  • ID/Passport/Green card numbers (along with their photocopies)
  • The applicant’s relationship with the host
  • The purpose and duration of the trip
  • Evidence of financial capability
  • Accommodation details
  • The host’s signature with date

Including these components guarantees the consular officer has comprehensive information to evaluate the visa application.

Another important aspect is to maintain a relationship with the visitor akin to that of a family member, friend, or partner. This demonstrates a genuine connection between the host and the visitor. If you’re uncertain about composing the visa invitation letter or need a visa invitation letter template, consider seeking counsel from an immigration attorney or a visa specialist.

Visitor’s Personal And Travel Details

The US visa invitation letter must include the visitor’s contact information in the following format: Full Name of the Visitor, Complete Address of the Visitor, and Contact Number of the Visitor. Additionally, the letter should contain the visitor’s passport number and other essential personal details such as the host’s particulars (name, address, contact information, passport number, and their relationship to the visitor) and the visitor’s particulars (full name, passport number, rationale for the visit, and duration of stay).

It’s necessary to incorporate details about the visitor’s travel plans, including:

  • The visitor’s full name
  • Duration and purpose of the visit
  • The host’s name
  • Contact information
  • Host’s address
  • Visitor’s address
  • US status

Supplying comprehensive and precise data about the visitor’s personal and travel specifics will enhance the visa application.

Host’s Responsibilities And Commitment

When inviting a foreign visitor, the host must be prepared to take on certain responsibilities. One of the main obligations is to guarantee that the visitor submits the visa at a U.S. port-of-entry before the visa expires. In the visa invitation letter, the host should explicitly specify whether they will provide financial support to the applicant for the duration of their stay in the U.S. and that they possess the resources to do so.

The host’s commitment section should include:

  • A guarantee of the visitor’s return to their home country prior to the expiration of their visa
  • Allotted time for the visit by both the host and the visitor
  • A clear indication of the host’s willingness to host the visitor
  • Mention of the host’s status as a U.S. citizen or legal permanent resident
  • A declaration of the relationship between the host and the visitor

Lastly, ensure that the host signs and dates the visa invitation letter, providing their host’s signature.

Legal Proofs And Assurances

To support the visa invitation letter, the host should provide legal proofs such as:

  • A scanned copy of their ID or passport
  • Evidence of financial subsistence
  • Proof of homeownership or rental contract
  • An itinerary of the visit

These documents will help confirm the host’s legal status as a lawful permanent resident in the US and their ability to support the visitor during their stay.

In the US visa invitation letter, the host can ensure that the visitor’s stay will be temporary by explicitly specifying the purpose of the visit, the intended duration of stay, and providing supporting documents such as return flight tickets or a detailed itinerary. Furthermore, the host can mention any connections the visitor has to their home country, such as employment, property ownership, or family, to demonstrate the visitor’s intention to return after the temporary stay.

Tailoring The Tone: How To Write An Invitation Letter

While writing a visa invitation letter, maintaining a formal and professional tone is paramount. Yet, while addressing the guest, adopting a personal and amiable tone helps establish a friendly rapport. This balance of tones ensures that the letter conveys a genuine and close relationship with the visitor while avoiding an overly formal or official demeanor.

Abstain from utilizing intricate language or excessively ornate phrases when constructing the tone of an invitation letter for a US visa. Utilize plain, unambiguous language and desist from including superfluous information. This will make it easier for the consular officer to understand the content of the letter and assess the visa application.

Invitation Letter Samples: A Closer Look

Illustration of a magnifying glass analyzing a sample invitation letter for a US visa

Evaluating examples of invitation letters aids in comprehending the structure and content of an effective letter for a US visa. Such a letter usually includes:

  • Full name as per International Passport
  • Date of birth
  • Address and contact number
  • Relationship with the host (the person writing the invitation letter)
  • Purpose and duration of the visit
  • Details of accommodation and financial support during the visit
  • Invitation and assurance of responsibility for the visitor’s stay in the US

Effective invitation letters include:

  • Complete details of the host in the US and the applicant in the foreign country
  • Written by a US citizen or a legal permanent resident
  • Clearly state the relationship between the host and the applicant
  • Provide information about the purpose of the visit and the duration of stay
  • Concise without being overly formal

By examining sample invitation letters, you can ensure that your letter includes all the required information and follows a proven format.

Additional Documentation: Bolstering Your Invitation Letter

To augment the visa application, including supporting documents like proof of financial resources, copies of identification/passports, and an itinerary is recommended. These documents, compiled in a visa document file, offer a comprehensive overview of the visitor’s plans and the host’s commitment, aiding the consular officer in assessing the visa application.

Financial documentation, admission letter(s), and other relevant documents such as employment verification, travel itinerary, and evidence of ties to the home country are most effective in a US visa application. By providing a comprehensive package of information and documentation, you can significantly bolster your invitation letter and increase the likelihood of a successful visa application.

Navigating The Submission Process

Upon completion of the invitation letter and gathering all essential documentation, they should be submitted to the relevant authorities. The invitation letter should be presented during the scheduled appointment at the consulate/embassy along with Form I-134, the Declaration of Support. Form I-134 serves to show that an individual in the United States will financially support the visa applicant during their visit.

It’s important to consult the official website of the U.S. embassy or consulate in your country for the most precise and up-to-date information on where and how to submit the invitation letter and accompanying visa documents. By following the submission process guidelines, you’ll ensure that your invitation letter and supporting documents reach the right hands and are properly considered during the visa application process.

Understanding Visa Types And Their Requirements

US visas are divided into two main categories: immigrant visas and nonimmigrant visas. Immigrant visas are intended for those who aspire to establish permanent residence in the US, whereas nonimmigrant visas are for temporary stays. The requirements for each type of US visa differ depending on the purpose of travel and the specific visa category. It is advisable to refer to the official website of the U.S. Department of State for comprehensive information on the requirements for each visa category.

Certain visa categories, such as the B-2 tourist visa, may be advantaged by having an invitation letter. However, an invitation letter is not mandatory for all visas. The demand for an invitation letter fluctuates contingent upon the nation and the particular visa type. It’s essential to understand the specific requirements for the visa category you’re applying to and determine if an invitation letter would be beneficial.

Financial Considerations: Explaining Support And Sponsorship

When hosting a foreign visitor, the host may be responsible for covering the guest’s expenses throughout the duration of the visit, as well as any outstanding payments upon the visitor’s departure. In the visa invitation letter, the host should demonstrate financial support by presenting evidence of adequate funds, such as bank statements, if they will be financing the visit. It may also be beneficial to mention the submission of Form I-134, Declaration of Financial Support, if applicable.

The sponsor for a visitor visa in the US is typically required to have an annual income that is at least 125% of the Federal Poverty Guidelines. To demonstrate financial ability to support a visitor for a US Visa, one can furnish evidence such as:

  • Bank statements
  • Tax returns
  • Other financial documents that illustrate one’s financial standing and capacity to cover the visitor’s expenses during their stay.

Finalizing Your Letter: Checklist Before Sending

Before dispatching your invitation letter, review its content and verify all required information and documentation is included. Check the accuracy of the data, purpose of the letter, clarity and brevity, supporting documents, and scan for errors or omissions. A comprehensive review of your invitation letter ensures its completeness and accuracy, raising the chances of a successful visa application.

Once your invitation letter is finalized, it’s time to submit it along with the required documents to the appropriate authorities. As mentioned earlier, the invitation letter should be presented during the scheduled appointment at the consulate/embassy in conjunction with Form I-134, the Declaration of Support. By following the submission process guidelines and ensuring that your invitation letter and supporting documents are complete and accurate, you’ll be well on your way to hosting your loved one in the United States.

Summary

In conclusion, crafting a compelling invitation letter for a US visa is a crucial step in the visa application process. By understanding the purpose and importance of the invitation letter, including essential components, tailoring the tone, and providing additional documentation, you’ll be well-equipped to create a strong visa application. With careful planning and attention to detail, you can increase the likelihood of your loved one receiving their visa and joining you in the United States for an unforgettable visit.

Frequently Asked Questions

How do I write a letter of invitation to a US visa?

The letter of invitation to a US visa should include the name of the inviting person or organization, contact information and address, relationship between the host and applicant, visa applicant’s full name and address, purpose of the trip, exact dates of the trip, and host’s signature.

Does a visa invitation letter need to be notarized?

A visa invitation letter does need to be notarized, as it requires verification and certification by a Notary Public. Additionally, visa offices usually require letters to be notarized in order to be considered valid supporting documents.

How much does US invitation visa cost?

The cost of a US invitation visa depends on the type, but generally it is around US$185. Most petition-based visas cost US$205, K visas cost US$265, and E visas cost US$315.

What is the main purpose of a visa invitation letter?

A visa invitation letter is a formal document composed by a US citizen or legal resident to invite their foreign relative to their residence, helping the US embassy or consular officer gain an understanding of the relationship between the applicant and the host, as well as the purpose of the visit.

How can I ensure that the visitor’s stay in the US will be temporary?

In order to ensure that the visitor’s stay in the US is temporary, the host should include a clear purpose of the visit, duration of stay and supporting documents in the visa invitation letter, such as return flight tickets or a detailed itinerary.

Types of Visas To US: Find Your Pathway

Navigating the complex world of types of visas to US can be overwhelming, especially when your future depends on it. With various visa categories and requirements, it’s crucial to understand the options available to make the right choice for your unique situation. In this comprehensive guide, we’ll break down the types of visas available, their purposes, and the application process, ensuring you have the knowledge to embark on your American journey with confidence.

Key Takeaways

  • The US visa system offers two categories of visas (immigrant and nonimmigrant) for a variety of purposes, with admission determined by the Department of Homeland Security.
  • Immigrant visas provide permanent residency while Nonimmigrant Visas are temporary, including work, study or tourist options.
  • The application process varies depending on category and involves labor certification, fees & interviews. Understanding rights & responsibilities is key to success in the US.

Overview Of US Visas

Overview of US Visas

The US visa system caters to a variety of visitors, such as students, workers, and tourists. For a better comprehension of your options, be aware that US visas fall into two main categories: immigrant visas and nonimmigrant visas. Immigrant visas lead to permanent residency in the United States, while nonimmigrant visas permit temporary entry for specific purposes like work, study, or tourism.

While both immigrant and nonimmigrant visas grant permission to enter the US, the final decision on admission lies in the hands of the Department of Homeland Security (DHS) and U.S. Customs and Border Protection (CBP) personnel at the port-of-entry. Next, we will examine these two visa categories and the different types of visas within each.

Immigrant Visas

An immigrant visa grants foreign nationals the right to live and work in the United States indefinitely as a lawful permanent resident. These visas typically require a job offer from a US employer or fall under specific categories like family sponsorship or investment. Immigration services play a crucial role in assisting applicants throughout this process.

Immediate family members of immigrant visa holders can also apply for the same visa category through citizenship and immigration services, and join their loved ones in the US.

Nonimmigrant Visas

Nonimmigrant visas, on the other hand, are temporary in nature and allow foreign nationals to enter the US for specific purposes, such as work, study, or tourism, with a limited duration of stay. These visas are granted for a variety of travel reasons and do not lead to permanent residence.

The conditions and requirements for obtaining a nonimmigrant visa vary depending on the visa category and the applicant’s circumstances.

Immigrant Employment-Based Visas

Immigrant Employment-Based Visas

For those seeking permanent employment in the US, there are five categories of employment visas, known as immigrant visas or employment-based visas (EB visas). These visas cater to a diverse range of professionals, from extraordinary talents to skilled workers, and require specific eligibility criteria to be met. The application process for these visas generally involves stages such as labor certification, immigration petition, and adjustment of status.

Keep in mind that the waiting period for each visa category can differ greatly, with waits of over fifteen years in some countries. Hence, comprehending the various EB visa categories and their prerequisites can assist in determining the ideal path for your permanent residency journey in the US.

EB-1: Extraordinary Ability And Priority Workers

The EB-1 visa is designed for individuals with extraordinary abilities, outstanding professors or researchers, and multinational executives or managers. The EB-1 visa category is highly prestigious and is divided into three subcategories. These are: EB-1A for persons of extraordinary ability, EB-1B for outstanding professors and researchers, and EB-1C for multinational executives and managers. The annual quota for EB-1 visas is 40,000, making it a highly sought-after option.

One of the advantages of the EB-1 visa is that it does not require labor certification, simplifying the application process. Family members of EB-1 visa holders are also eligible to apply for admission to the US.

EB-2: Advanced Degree Professionals

The EB-2 visa is reserved for professionals holding advanced degrees or individuals with exceptional ability in their field. To qualify for this visa, applicants must have a job offer in the US that requires an advanced degree or demonstrate exceptional ability in their field of expertise. In most cases, labor certification is required for the EB-2 visa, except for those who qualify for a National Interest Waiver.

A National Interest Waiver can exempt applicants from the labor certification requirement if their employment is deemed to be of significant benefit to the United States. This waiver, which serves as an employment authorization document, can be a valuable option for those with exceptional abilities seeking a more streamlined application process.

EB-3: Skilled, Unskilled, And Professional Workers

The EB-3 visa is intended for skilled workers, professionals, and unskilled workers with a US job offer. Applicants must have a bachelor’s degree or equivalent, and skilled or unskilled laborers must have a non-temporary job offer from a US employer. Family members of EB-3 visa holders are also eligible to apply for admission to the US.

To obtain an EB-3 visa, applicants must undergo the Permanent Labor Certification Program. This program ensures that there are insufficient qualified US workers available for the position and that the foreign worker’s employment will not adversely affect the wages and working conditions of similarly employed US workers.

EB-4: Special Immigrants

The EB-4 visa is a specialized category for a range of individuals. This includes:

  • Religious workers
  • Employees of US foreign service posts
  • Retired employees of international organizations
  • Noncitizen minors who are wards of courts in the United States

The eligibility criteria for the various categories within the EB-4 visa can be found on the USCIS website.

For example, religious workers applying for an EB-4 visa must meet specific requirements provided by the USCIS. Foreign service employees can apply for an EB-4 visa by having their employer submit a Form I-360, Petition for Amerasian, Widow(er), or Special Immigrant, and receiving approval from the US government prior to sponsoring the foreign worker under the Special Immigrants Visa category.

EB-5: Investors

The EB-5 visa is designed for foreign investors who create jobs and contribute to the US economy. To qualify for this visa, applicants must invest a minimum of $1.8 million or $800,000 in a Targeted Employment Area, and create at least 10 full-time positions for US workers.

This visa category can be an attractive option for those looking to make a significant financial contribution to the US while obtaining permanent residency.

Nonimmigrant Work Visas

Nonimmigrant Work Visas

For those seeking temporary employment in the US, nonimmigrant work visas offer a range of options tailored to specific occupations and purposes. These visas grant permission to work in the US for a limited time and are subject to restrictions, such as the type of employment, specific employers, and duration of employment.

Next, we will cover the different types of nonimmigrant work visas, such as:

  • H visas
  • L visas
  • O visas
  • TN visas

We will also discuss their associated prerequisites to assist you in identifying the best fit for your temporary employment needs with a prospective employer.

H Visas: Temporary Workers

The H visa category encompasses temporary workers in various fields. There are different types of H visas, including:

  1. H-1B visa: This visa is intended for individuals working in specialty occupations that require a higher education degree or its equivalent.
  2. H-2A visa: This visa is for individuals seeking training in endeavors other than graduate medical school or training.
  3. H-2B visa: This visa is for individuals requiring special education.

These visas provide temporary work opportunities in the United States for individuals with specific skills and qualifications.

The H-1B visa is one of the most popular work visas in the US, with an annual cap on the number of visas issued. However, the application process can be complex, and many companies rely on the expertise of immigration law firms to navigate the intricacies successfully. It’s also important to note that H-1B visa holders are generally not allowed to transfer employers.

L Visas: Intracompany Transferees

The L visa category is designed for intracompany transferees, such as managers, executives, or employees with specialized knowledge. There are two subcategories within the L visa: the L-1A visa for managerial or executive capacity and the L-1B visa for those with specialized knowledge.

To apply for an L visa, the company must submit the necessary paperwork, including the Form DS-160, and pay the required fees. The initial period of stay for L visa holders is three years, with the possibility of extensions.

O Visas: Extraordinary Ability Or Achievement

The O visa category is reserved for individuals with extraordinary ability or achievement in the sciences, arts, education, business, or athletics. There are two subcategories within the O visa: the O-1A visa for individuals with extraordinary ability in their field, and the O-1B visa for those with a demonstrated record of extraordinary achievement in the motion picture or television industry.

The initial period of stay for O visa holders is up to three years, and family members of O visa holders are eligible to receive O visas as well. This visa category can be a valuable option for those with exceptional talents seeking temporary employment in the US.

TN Visas: NAFTA Professionals

The TN visa category is specifically for Canadian and Mexican professionals under the North American Free Trade Agreement (NAFTA). To qualify for a TN visa, applicants must have a bachelor’s degree or higher in their field and meet the specific requirements of their profession.

The initial duration of stay for TN professionals is three years, and the visa can be extended in three-year increments. This visa category provides a streamlined option for qualified professionals from Canada and Mexico to work temporarily in the US.

Student And Exchange Visitor Visas

Student and Exchange Visitor Visas

For individuals looking to pursue studies in the United States, the F, M, and J visas cater to academic, vocational, and exchange students. These visas allow students to study at US institutions and engage in cultural exchange programs, enriching their educational experience and fostering global understanding.

Next, we will examine the varying types of student and exchange visitor visas, including their eligibility requirements and application procedures, to assist you in finding the right path to reach your educational goals in the US.

F Visas: Academic Students

The F visa is for academic students pursuing a full course of study at a US institution. To be eligible for an F visa, applicants must meet specific requirements, including:

  • Being accepted by a Student and Exchange Visitor Program (SEVP)-approved school
  • Possessing a valid Form I-20
  • Demonstrating adequate financial resources.

Many US institutions accept F visa students, including renowned universities like Pace University, University of Texas at Arlington, and Boston University. This visa category provides a gateway for foreign students to access world-class education and broaden their horizons.

M Visas: Vocational Students

The M visa is designated for vocational students enrolled in non-academic programs at US institutions. To qualify for an M visa, applicants must possess a valid passport and provide evidence of admission into a vocational or nonacademic program.

This visa category offers a unique opportunity for students seeking to develop hands-on skills and expertise in their chosen field.

J Visas: Exchange Visitors

The J visa category is for exchange visitors participating in work and study-based programs promoting cultural exchange. To be eligible for a J visa, applicants must be sponsored by an authorized program sponsor and meet the specific eligibility criteria for their program.

The J visa program fosters international understanding by enabling participants to experience life in the United States while sharing their own culture and perspectives with American citizens. This enriching experience not only broadens the horizons of the individuals involved but also contributes to a more connected and diverse global community.

Temporary Business Visitor Visas

Temporary Business Visitor Visas

The B-1 visa is for individuals engaged in short-term business activities in the US, such as attending conferences, negotiating contracts, or consulting with business associates. To be eligible for a B-1 visa, applicants must meet specific requirements, such as having a residence outside the US that they do not intend to abandon, and having sufficient funds to cover their expenses while in the United States.

This visa category allows professionals to conduct business in the US without the need for long-term commitment.

B-1 Visas: Business Visitors

The B-1 visa is designed for business visitors engaged in temporary business activities in the US. Applicants must meet specific requirements, such as demonstrating a legitimate business purpose for their trip and having strong ties to their home country.

The maximum duration of stay for a B-1 visa holder is six months, with the possibility of extensions. This visa category offers a flexible option for professionals seeking to conduct business in the US on a temporary basis.

Application Process And Requirements

The application process and requirements for obtaining a US visa vary depending on the visa category and the applicant’s circumstances. In general, the process involves labor certification, a visa interview, and additional steps such as digital fingerprints and associated fees, including the visa issuance fee. Knowing the requirements and procedures for your specific visa type will help ensure a smooth application process and increase your chances of success.

In the upcoming sections, we’ll examine the labor certification process and the visa interview in depth, providing useful information on the steps and requirements for obtaining your US visa.

Labor Certification

Labor certification is the process of obtaining approval from the Department of Labor for certain work visas, ensuring that the employment of a foreign worker will not have an adverse impact on US workers. This process typically involves three steps: PERM Labor Certification, I-140 Immigrant Petition, and Adjustment of Status or Consular Processing.

Different visa categories may have specific requirements and criteria for labor certification. For example, the EB-2 visa generally requires labor certification, except for those who qualify for a National Interest Waiver. Understanding the labor certification requirements for your specific visa category will help you navigate the application process with ease.

Visa Interview And Approval

The visa interview is a significant step in the US visa application process. Applicants are required to attend a visa interview at a US embassy or consulate in their country of residence. During the interview, applicants are expected to:

  • Provide honest information
  • Answer questions about their reason for visiting the US
  • Answer questions about their background
  • Answer questions about their qualifications for the visa category they are applying for.

To prepare for the visa interview, applicants should arrive punctually, dressed appropriately, and with all required documents. Providing accurate information during the interview is essential, as any misrepresentation or inaccuracies may result in visa denial. By following these guidelines, you can increase your chances of a successful visa interview and approval.

Rights And Responsibilities Of Visa Holders

As a US visa holder, you possess certain legal rights, protections, and obligations. You have the right to a safe work environment and the freedom to travel within the US. However, you are also responsible for complying with US laws, paying taxes on time, and adhering to any specific requirements of your visa category.

Failing to abide by the terms of your US visa can result in serious consequences, including removal from the country, being barred from re-entry, and forfeiting your ability to maintain a lawful immigration status. By understanding and respecting your rights and responsibilities as a visa holder, you can help ensure a successful and fulfilling experience in the United States.

Summary

In conclusion, understanding the various types of US visas and their requirements is essential for making informed decisions about your journey to the United States. Whether you’re seeking permanent residency, temporary employment, or an opportunity to study or engage in cultural exchange, this comprehensive guide has provided you with the knowledge and insights necessary to navigate the complex world of US visas. With this information in hand, you’re one step closer to achieving your American dream.

Frequently Asked Questions

How many types of visas are there in the US?

There are two types of US visas, Nonimmigrant and Immigrant, both of which allow for travel to the US for temporary or permanent residence respectively.

What are the 4 most common types of visas?

The four most common types of visas are Tourist, Business, Work and Transit Visas.

How long is a B-2 visa good for?

A B-1 or B-2 visa has a validity of 10 years from its issuance, allowing the holder to stay in the United States for up to 180 days per entry. However, if the visitor wishes to stay for longer than 6 months, they may need to apply for an extension.

What is the easiest type of visa to get in the US?

Obtaining a “B” visitor visa is usually the most straightforward way to enter the United States for a temporary stay.

What is the difference between immigrant and nonimmigrant visas?

Immigrant visas provide a pathway to becoming a permanent resident in the US, whereas nonimmigrant visas allow only temporary entry for specified activities such as work, study, or tourism.

Less Stress. More Visa Success. Since 2009. Apply With Confidence.

Get started