Visa Interview Archives - Immikare

US Visa Interview: Essential Tips And Common Questions

Navigating the US visa interview process is a crucial step for any visa applicant seeking to secure a visa to the United States.

This guide will walk you through the preparation process, highlight essential tips, and address common interview questions to help you make a confident impression and increase your chances of a successful outcome.

Types Of US Visas Requiring An Interview

Different visa categories have unique requirements and interview procedures. Here’s a look at some common types that typically require an interview:

  • Tourist (B-2): For short visits, such as tourism, visiting family, or medical treatment.
  • Student (F-1): For students attending accredited US academic institutions.
  • Work Visa (H-1B): For individuals sponsored by an employer to work in the US.

Immigrant visas are for those seeking permanent residence, while nonimmigrant visas are for temporary stays.

Understanding your visa type is essential to prepare effectively, as interview questions may vary slightly based on your application purpose.

Types Of US Visa Interviews

  • Immigrant visa interviews: for applicants seeking to live and work in the US permanently.
  • Nonimmigrant visa interviews: for applicants seeking to visit the US temporarily for business, tourism, or study.
  • Student visa interviews: for applicants seeking to study in the US.
  • Work visa interviews: for applicants seeking to work in the US.

Visa applicants must be prepared for different types of questions based on their visa category.

Preparing For Your US Visa Interview

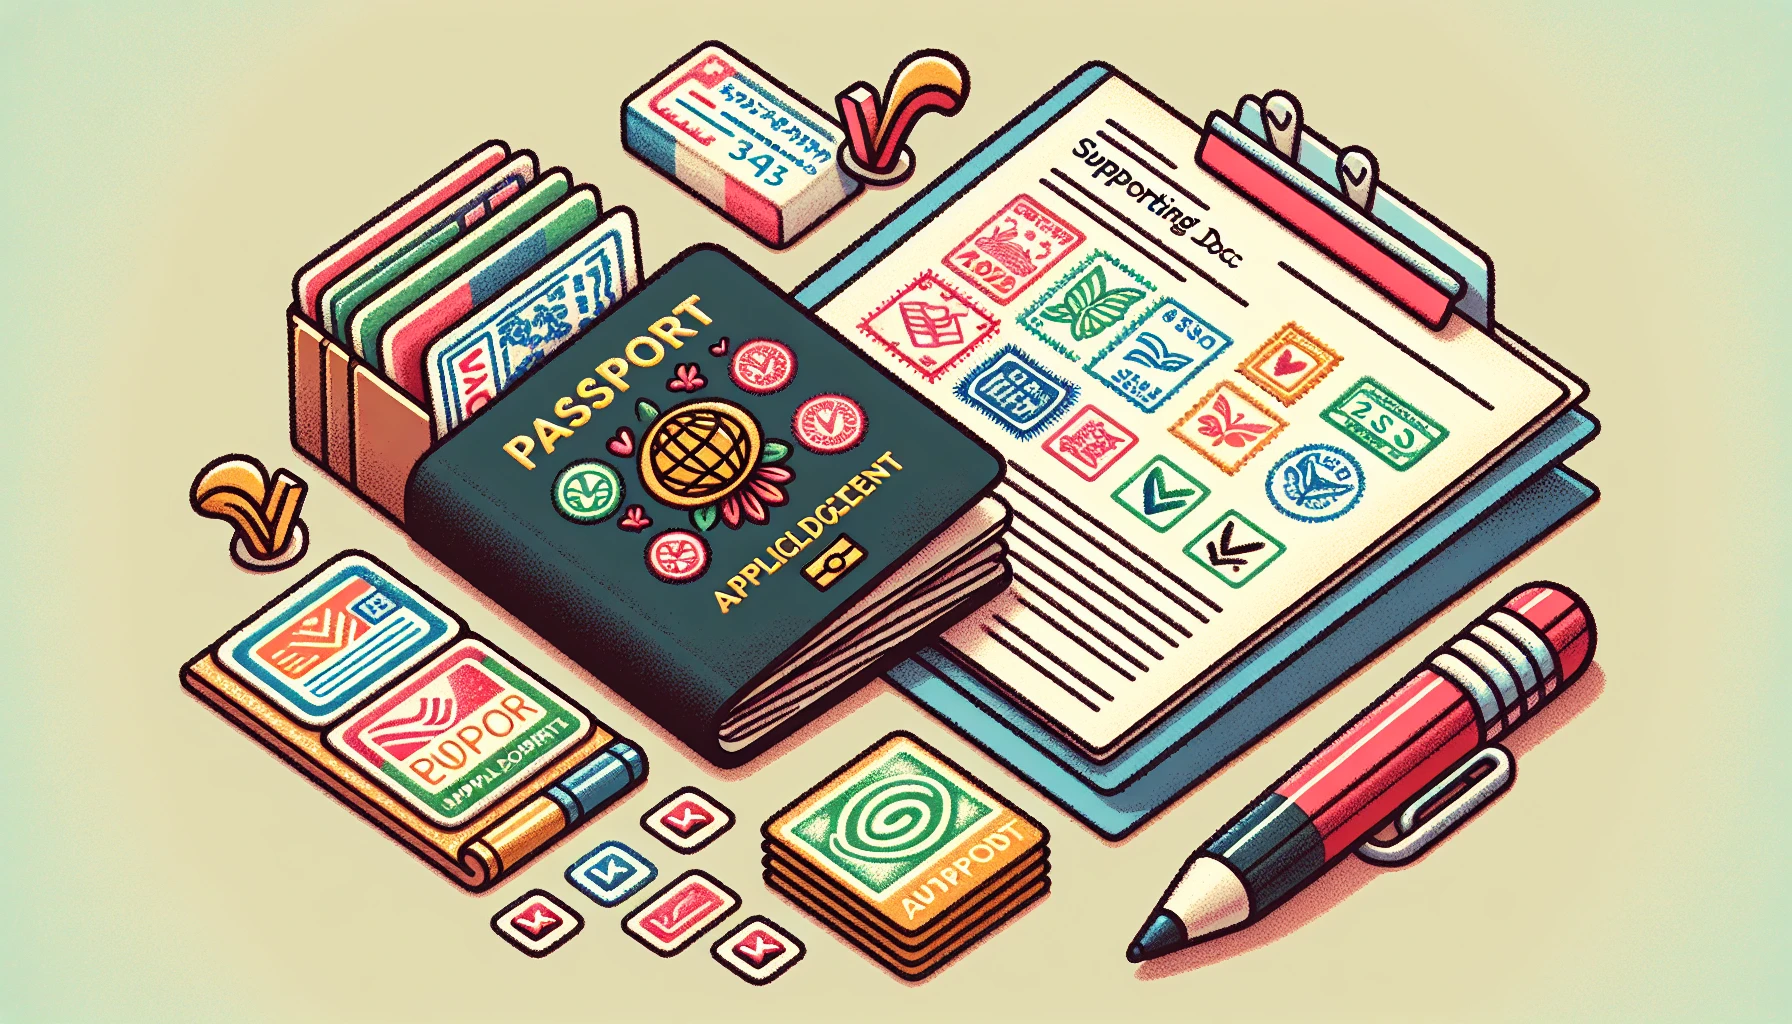
1. Essential Supporting Documents

Having all necessary documents ready is vital. The required documents generally include:

  • Valid passport (with at least six months validity).
  • DS-160 confirmation page (completed and printed).
  • Visa fee receipt.
  • Recent passport-sized photos.
  • Appointment confirmation letter.
  • Supporting documents, such as financial records, admission letters, employment verification, and travel itinerary.

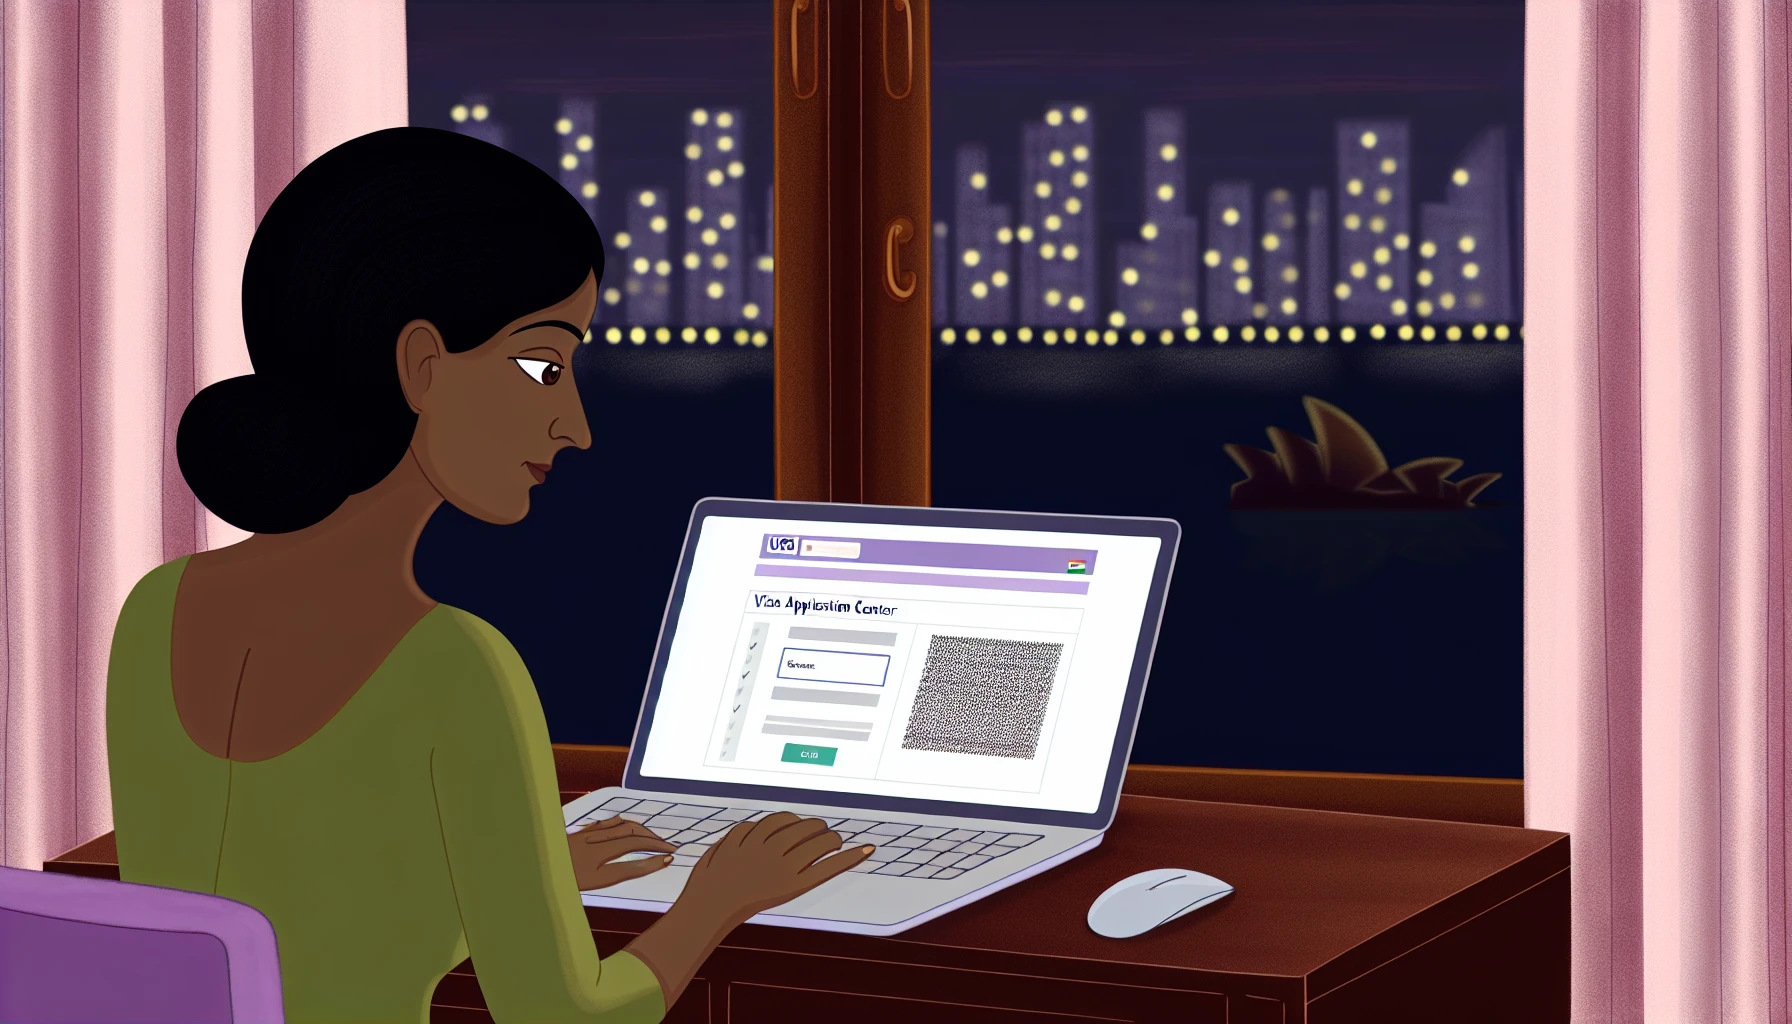
2. Scheduling The Interview

To schedule your visa appointment, visit the US Embassy or Consulate website.

Choose an interview date and time based on availability, and be sure to bring your appointment confirmation on the day of the interview.

3. Understanding The Process

Interviews typically involve security checks, so arrive early to allow time for this process. Once inside, applicants are guided through document checks before meeting with a consular officer.

The interview itself is usually brief, focusing on the purpose of your visit and ensuring your intentions align with visa regulations.

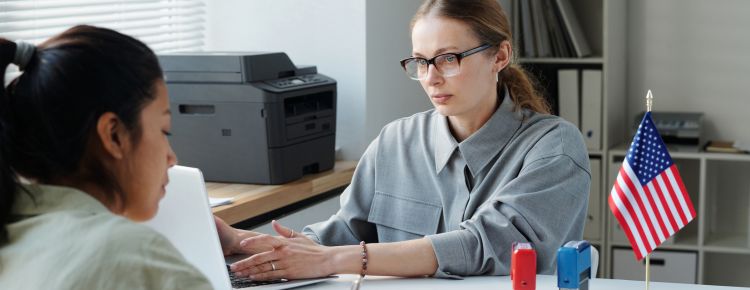
Understanding The US Visa Interview Process

US Visa Interview Process

The US visa interview is a crucial step in the visa application process, where an interviewing officer assesses the applicant’s eligibility for a US visa.

The interview is usually conducted at a US Embassy or Consulate, and the location depends on the type of visa and the applicant’s country of residence.

The National Visa Center (NVC) reviews the applicant’s file and schedules an interview appointment with the US government.

The interview appointment is a critical step in the visa application process, and it’s essential to be prepared with all necessary documents and information.

The US Visa Interview Experience With A Consular Officer

US Visa Interview With A Consular Officer

The interview is typically conducted by a single consular officer who conducts visa interviews and will ask you a wide range of questions about your application and proposed stay in the US.

The officer will assess your eligibility for a US visa and verify the information provided in your application.

The interview may include questions about your background, education, work experience, and travel plans.

Be prepared to provide detailed information and answer questions clearly and concisely.

Preparing For The US Visa Interview

  • Research the specific requirements for your visa type and the embassy or consulate where you will be interviewed.
  • Gather all required supporting documents, including a valid passport, birth certificate, and proof of residence abroad.
  • Review the visa application process and the interview questions to ensure you are prepared.
  • Practice your responses to common interview questions to build confidence.

Common US Visa Interview Questions And How To Answer Them

Preparation for common interview questions can help you respond confidently. Here are a few frequently asked questions and tips for handling them:

Why Do You Want To Visit The United States?

Clearly and concisely state your reason. For instance, “I am visiting for tourism and to explore popular landmarks,” or “I’m a student enrolled in [University] to pursue my degree in [Field].”

How Long Do You Intend To Stay In The US?

Be specific about your intended stay duration. Avoid vague answers, and back up your response with itinerary details if possible.

Do You Have Family Or Friends In The US?

Be honest; consular officers verify information. If you have relatives, mention who they are and your relationship with them.

What Do You Do For A Living?

Briefly describe your job or studies and emphasize ties to your home country, showcasing that you intend to return.

How Will You Fund Your Trip?

Discuss your financial arrangements confidently. If a family member or employer is sponsoring you, mention this and show financial documentation if requested.

Tips For A Successful US Visa Interview

Dress Professionally: Presenting yourself professionally sets a positive impression.

Arrive Early: Arrive 15–30 minutes before your appointment. This allows time to clear security and relax before the interview.

Be Honest and Concise: Answer truthfully and avoid unnecessary elaboration. Consular officers appreciate clarity.

Show Confidence: Maintain eye contact, speak clearly, and avoid appearing nervous. Consulate staff are trained to notice hesitation or inconsistencies.

Bring Supporting Documents: While they may not ask for everything, having documents like bank statements, academic transcripts, or proof of employment can support your case.

What To Bring To The US Visa Interview

  • A valid passport with at least six months’ validity.
  • A printed copy of your visa application (DS-160) confirmation page.
  • Supporting documents, such as proof of residence abroad, job, and support.
  • Any additional documents required by the embassy or consulate.

After The US Visa Interview

After the visa interview appointment, your visa will either be approved, denied, or put under administrative processing.

The consular officer will inform you:

  • Whether your application has been approved, or
  • Whether your application has been denied, or
  • Whether further documentation is required.

If your application is approved, your passport will be returned to you with a visa.

If your application is denied, you will be informed of the reasons for the denial and any next steps.

Here’s What To Expect In Each Case:

  • Approval: The consular officer will inform you, and you can expect to receive your visa within a few days.
  • Denial: If your visa is denied, you’ll receive a document explaining the reason. Common reasons include missing ties to your home country or insufficient financial evidence.
  • Administrative Processing: Some applications require additional review. If this happens, the consular officer will inform you of the steps and expected timeline.

Conclusion

This guide equips you with the knowledge to approach the US visa interview confidently and thoroughly prepared. By following these steps, you can help ensure a smooth interview experience, enhancing your chances of securing your US visa.

Frequently Asked Questions (FAQ)

Q: How long does a US visa interview take?

Typically, the interview itself is brief, often under five minutes. However, plan for extra time due to security checks and document verification.

Q: Can I reschedule my visa interview?

Yes, rescheduling is usually allowed, but there may be limits on how frequently you can reschedule within a certain timeframe.

Q: What should I do if my visa is denied?

You can reapply, but it’s essential to address the reason for denial before doing so. Often, reapplying with stronger supporting documents or clearer ties to your home country can improve your chances.

Q: Is an interpreter allowed during the interview?

Most US embassies provide interpreters for certain languages if necessary, but check with your local consulate in advance.

What is the purpose of the US visa interview?

The US visa interview is conducted to assess an applicant’s eligibility for a visa and confirm that, their intentions align with the visa type they are applying for.

Consular officers use the interview to evaluate the applicant’s background, travel purpose, and ties to their home country, which helps them decide whether to approve or deny the visa.

What documents should I bring to the US visa interview?

You should bring:

  • A valid passport (with at least six months of validity remaining).
  • The DS-160 confirmation page (completed and printed).
  • Visa fee receipt.
  • Appointment confirmation letter.
  • Recent passport-sized photos that meet visa photo requirements.
  • Supporting documents, such as bank statements, proof of employment, school admission letters, or travel itineraries, depending on your visa type.

Can I bring a translator to the US visa interview?

Most US embassies and consulates offer interpreters for common languages if needed. However, it’s best to check with the specific embassy or consulate where your interview is scheduled to confirm availability.

In cases where no interpreter is available, the consulate may make accommodations.

What should I do if I don’t understand a question during the interview?

If you don’t understand a question, politely ask the consular officer to repeat or clarify it. It’s essential to be clear on what’s being asked to provide accurate responses.

You can say, “Could you please clarify that question?” or “I’m sorry, could you repeat that question?”

Additional Resources And Assistance

  • Check the US Department of State’s website for information on visa requirements and application procedures.
  • Contact the National Visa Center (NVC) for assistance with the visa application process.
  • Consider seeking the help of an immigration attorney or visa consultant.

USCIS Visa Appointment India: Scheduling And Preparation

Imagine the excitement of planning your dream trip to the United States, only to find yourself overwhelmed by the complex visa application process. Navigating the intricacies of USCIS visa appointment India can be challenging, but fear not! This comprehensive guide will walk you through every step, from initiating your application to preparing for your visa interview, ensuring a smooth and stress-free experience.

By understanding the USCIS visa appointment India system and following the tips provided, you’ll be well on your way to securing your visa and embarking on your much-anticipated journey. So, let’s dive into the world of USCIS visa appointment India and make your dream trip a reality!

Key Takeaways

  • Understand the process for USCIS visa appointments in India to ensure a successful application.
  • Pay the non-refundable fee, complete forms accurately and provide evidence of strong ties to home country.
  • Track progress of application regularly and be aware of special considerations for certain visas.

Understanding USCIS Visa Appointments In India

USCIS visa appointments in India involve processing various types of visas, ranging from business travelers and tourists to future spouses. Setting up a visa appointment is necessary for an accurate and speedy visa application process. Having the right documents and information ready can result in a successful visa application rather than a disheartening denial.

The application process for US tourist visas for Indian citizens includes the following steps:

  1. Complete the DS-160 form.
  2. Pay the non-refundable application fee.
  3. Create an account with the Visa Information Service.
  4. Select a preferred US visa application center.
  5. Secure an interview slot at the embassy or consulate.
  6. Prepare the required documents for the visa interview.

Types Of Visas Processed By USCIS

The United States Citizenship and Immigration Services (USCIS) processes various types of non immigrant visas, such as tourist, business, and transit visas. The US B2 tourist visa, for example, is a nonimmigrant visa issued to individuals seeking to enter the US for a temporary period of time. It can be valid for up to 10 years and allows a maximum stay of 180 days per visit.

A transit visa, such as the C1 visa, permits travelers to enter the US for a layover before proceeding to their final destination. The C1 visa is valid for a maximum of 29 days or until the date of departure from the US, whichever occurs first.

The Importance Of Scheduling An Appointment

Arranging a visa appointment is key to a successful application, allowing you to:

  • Establish a specific meeting date and time with the consular officer
  • Present your documents
  • Respond to queries
  • Offer any supplementary details necessary for your visa application

Without scheduling an appointment, you may not be able to proceed with the application process.

In some instances, arranging a medical examination before a visa appointment is required to verify that visa applicants meet the standards set by the United States Public Health Service. It’s advisable to schedule the medical exam upon receiving your appointment date.

Initiating Your Visa Application

Completing the DS-160 Form for US Visa Application

Before submitting a US visa application in India, the visa process involves several steps:

  1. Pay the visa fee.
  2. Complete the DS-160 form, which is the US visa application form required by the Department of State.
  3. After receipt of the appointment letter, register electronically.
  4. Arrange a biometrics appointment.

The visa application ID, which is utilized throughout the visa application process, is an essential piece of information required for successful application submission.

Completing The DS-160 Form

The DS-160 form is an online application for a US visa and can be completed through the Consular Electronic Application Center. This form requires the following information:

  • Travel details
  • Companion details (if applicable)
  • Previous US travel details (if applicable)
  • Address and contact information
  • Work or educational details
  • Security and background information

After completing theDS-160 form, it’s recommended to review the application to ensure all the information is accurate. Additionally, print a copy of the completed form for your personal records. The Application ID number may be required for subsequent steps of the application process.

Paying The Non-Refundable Application Fee

The non-refundable application fee for a US visa in India is $205 for certain petition-based nonimmigrant visas for temporary workers in the H, L, O, P, Q, and R categories. You can pay the US tourist visa fees in India using various methods, such as:

  • Demand Draft
  • Credit/debit card
  • Cash
  • National Electronic Funds Transfer (NEFT)

Paying the US visa application fee online in India prior to the visa appointment is necessary. The receipt for payment of the Machine-Readable Visa (MRV) fee serves as evidence of payment required for the US visa application fee in India.

Booking Your USCIS Visa Appointment

Booking USCIS Visa Appointment in India

To arrange a US visa appointment in India, you need to furnish details like the visa fee deposit reference number, the barcode number on the DS-160 confirmation page, visa type, personal data, any dependents, document delivery location, and the visa payment. Two appointments are required: one for submitting biometric information at a Visa Application Center (VAC) and another for the visa interview at the embassy or consulate.

The US VAC in India has a specific purpose. It collects biometric data, photos and fingerprints of visa applicants before they submit them to the consular section. Be prepared to present your passport and appointment letter at your US visa interview at the US Embassy or Consulate in India.

Creating An Account With The Visa Information Service

To create an account with the Visa Information Service for scheduling US visa appointments, you must follow these steps:

  1. Register and create a profile online.
  2. Access the official website of the Visa Information Service.
  3. Follow the instructions provided to create your account.

Completion of the DS-160 form is required before setting up an account with the Visa Information Service. The information provided in the form will be used to schedule your US visa appointment.

Selecting Your Preferred US Visa Application Center

When selecting a preferred US Visa Application Center in India, consider factors such as:

  • Location
  • Appointment availability
  • Processing time
  • Facilities and services
  • Reputation
  • Additional services

The chosen US Visa Application Center in India may influence visa processing time, so consult the specific wait times and processing information provided by the US embassy or consulate in India for more precise information.

All US Visa Application Centers in India are equipped to process all types of visas, ensuring a consistent level of service across the centers.

Securing Your Interview Slot At The Embassy Or Consulate

It’s advised to arrange your US visa interview in India at the earliest opportunity. The wait time for an interview appointment may vary depending on the workload and staffing at the embassy or consulate. Consult the estimated wait time on the official website and arrange your appointment accordingly.

Keep in mind that the US Embassy in India does not permit walk-ins for visa interviews. Visa interviews are conducted strictly by appointment, so make sure you secure your interview slot in advance.

Preparing For Your Visa Interview

Preparing for US Visa Interview

The visa interview is a key part of the application process, and meticulous preparation can notably enhance your chances of success. From compiling a comprehensive document checklist to understanding what to expect during the interview, being well-prepared will give you the confidence to navigate this crucial stage of your visa application journey.

Individuals aged between 14 and 79 are typically required to attend a visa interview. During the interview, the consular officer will assess your eligibility to acquire a visa. To ensure a successful visa application, it is imperative that all information provided on the forms is accurate, and that you demonstrate strong ties to your home country.

Document Checklist For The Visa Interview

Possessing a detailed checklist of necessary documents for the visa interview is required for a seamless and successful application process. Some common documents required include:

  • A valid passport
  • The DS-160 confirmation page
  • Evidence of financial capability to cover the trip expenses
  • A letter of invitation or support from a sponsor (if applicable)
  • Evidence of ties to the home country
  • Travel itinerary or flight reservation
  • Evidence of accommodation arrangements

Additionally, you may need to provide employment or education-related documents such as an employment letter, pay stubs, or enrollment letter. Remember that the specific documents required may vary depending on the visa type and individual circumstances, so consult the official website of the U.S. Embassy or Consulate in your country for the most accurate and up-to-date information.

What To Expect During The Visa Interview

The visa interview process involves a consular officer interviewing the applicant and any accompanying family members to assess their eligibility to receive a visa. Questions pertaining to travel plans, the purpose of the visit, and other relevant information may be asked. It’s important to dress professionally and be well-prepared for the interview.

The purpose of the consulate officer during a US visa interview is to assess the eligibility and credibility of the visa applicant. They evaluate the applicant’s intentions, ties to their home country, and ability to support themselves financially during their stay in the US. The officer’s objective is to determine if the applicant meets the requirements for the visa category they are applying for.

After The Visa Interview

Upon completion of your visa interview, you will receive notification about the result of your US visa application. If your application does not require additional administrative review, and your visa is approved, it will take three to four days for the visa to be issued. It’s crucial to stay informed of the status of your visa application and understand the different stages of the process.

This section will cover administrative processing and its potential effects on your visa application processing time. We’ll also provide guidance on tracking your visa application status after the interview.

Understanding Administrative Processing

Administrative processing serves as an extra review stage that might be needed for some visa applications. During this stage, the consular officer may request further information or documentation, conduct additional security checks, or schedule another interview. Administrative processing can have a considerable impact on the overall visa application timeline, as there is no set timeline for this process, and it can range from months to years, depending on the case.

To reduce the likelihood of your visa application undergoing administrative processing, accurately proving that you fulfill all the criteria for your visa category is required. This includes providing all the necessary documentation and evidence to support your application.

Tracking Your Visa Application Status

You can track the progress of your US visa application online through the USCIS website or by contacting the USCIS directly via telephone or email. The processing time for your visa application may vary depending on factors such as the type of visa, the workload of the processing center, and any additional processing requirements. It is advisable to frequently check the USCIS website or contact the embassy or consulate for the most recent information concerning the status of your visa application.

An “administrative processing” status in relation to a US visa application signifies that the application requires further investigation or assessment by a consular officer before a final decision can be made. This can include additional security checks, verification of documents, or additional interviews. The administrative processing status can cause delays in the visa application process, and the duration can vary depending on the particular case.

Special Considerations For Certain Visa Types

Some visa types have unique requirements or considerations. For example, transit visas and multiple entry visas have specific application processes and benefits that are worth understanding when applying for a US visa. This section will cover the prerequisites and application procedures for transit visas and multiple entry visas.

Understanding these special considerations can help you navigate the visa application process more efficiently and increase your chances of obtaining the appropriate visa for your needs.

Transit Visa Requirements

If your layover in India exceeds 24 hours or you need to clear immigration, even if the layover time is less than 24 hours, you’ll need to obtain a transit visa. If you meet all the required criteria, such as having a layover time of less than 24 hours, a confirmed onward ticket, and remaining in the designated transit area of the airport, you may be able to transit through India without a visa.

Transit visas in India typically have a validity period of 15 days. It’s always a good idea to consult the Indian embassy or consulate for the most up-to-date information on transit visa requirements and validity periods.

Applying For Multiple Entry Visas

A multiple entry visa allows you to travel to the United States multiple times without having to reapply for a visa, providing more flexibility and convenience in your travel arrangements. To apply for a multiple entry visa, you’ll need to follow the standard application process, which includes submitting the necessary documents, paying the required fees, and attending the visa interview.

Having a multiple entry visa can be advantageous, as it affords you the freedom to explore the US and return to your home country multiple times without the hassle of applying for a new visa each time. This can save you time, money, and stress during your travels.

Tips For A Successful Visa Application

A triumphant visa application necessitates meticulous preparation and a keen eye for detail. Ensuring that all information provided on the forms is accurate and that you demonstrate strong ties to your home country can greatly improve your chances of a successful application.

This section will offer tips on verifying the precision of information on forms and building solid connections to your home country during the visa interview process. By following these tips, you’ll be well on your way to a smooth and successful visa application process.

Accuracy Of Information On Forms

Supplying correct details on USCIS visa application forms is critical, as incorrect or false information can result in delays, rejections, or potential legal repercussions. Common errors on USCIS visa application forms include:

  • Incomplete or incorrect information
  • Forgotten signatures
  • Using outdated forms
  • Hiding any alterations made on the form

To confirm the accuracy of the information you supply on USCIS visa application forms, you can:

  • Submit supporting documents
  • Undergo biometric verification
  • Establish a USCIS online account
  • Utilize the SAVE Program for immigration status verification.

Strong Ties To Home Country

During US visa interview, showcasing solid connections to your home country can significantly enhance your probability of a successful application. Examples of strong ties include:

  • Proof of property or significant assets in your home country
  • Employment contracts or pay stubs
  • Connections with family and friends
  • Community involvement
  • Possession of valuable possessions

Other ways to demonstrate strong ties to your home country during the visa interview include providing evidence of a stable job or business, ongoing education or professional development, and active participation in community or social organizations.

Summary

Navigating the USCIS visa appointment process in India can be challenging, but with the right guidance, you can successfully secure your visa and embark on your dream trip to the United States. By following the steps outlined in this comprehensive guide, from initiating your application to preparing for your visa interview, you’ll be well-equipped to handle the complexities of the visa application process.

Remember, thorough preparation and attention to detail are key factors in ensuring a successful visa application. Keep these tips in mind as you embark on your journey, and before you know it, you’ll be exploring the wonders of the United States with confidence and ease.

Frequently Asked Questions

Are new US visa appointments open in India?

US visa appointments are open in India, though availability may be limited based on local conditions and operational capacity. You can apply for an interview at whichever location is most convenient.

How long is the wait for US visa appointment in India?

The wait for US visa appointment in India currently ranges between 6 and 10 weeks.

What is the USCIS visa appointment process in India?

The USCIS visa appointment process in India involves scheduling an appointment, submitting the necessary documents, completing the DS-160 form, paying the non-refundable application fee, and attending the visa interview at the embassy or consulate.

How can I track the status of my visa application?

You can track the progress of your US visa application online through the USCIS website or by contacting them directly.

What types of visas are processed by USCIS?

USCIS processes a variety of visas, including tourist, business, and transit visas.

Renewing US Visa: Guide To A Smooth Process

The desire to extend your stay in the United States, whether it’s for work, study, or leisure, often necessitates renewing your US visa. While the thought of going through this process might initially seem overwhelming, understanding the ins and outs of renewing US visa can help you navigate it with ease. This comprehensive guide will cover everything you need to know about renewing US visa, from eligibility criteria to the interview waiver program.

By following the step-by-step instructions provided in this guide, you’ll gain a clear understanding of the renewing US visa process along with valuable insights on how to overcome potential setbacks. Let’s begin this journey towards a seamless visa renewal experience.

Key Takeaways

  • Understand US visa renewal eligibility criteria and types of visas eligible for renewal.
  • Complete Form DS-160, gather necessary documents and potentially arrange an interview. Check Visa Interview Waiver Program to see if it applies.
  • Pay applicable fees, check application status regularly & understand what to expect after approval or denial of a US visa renewal.

Understanding US Visa Renewal Eligibility

Renewing US visa eligibility criteria

In the context of US visa renewal, the initial step is to ascertain your eligibility. The eligibility criteria vary depending on the type of visa you hold and its expiration date. Knowing these factors will ensure that you’re well-prepared for the renewal process, minimizing any disruptions to your plans.

To gain a better understanding of eligibility, we will examine the various types of visas that qualify for renewal, their specific requirements, and the significance of expiration dates and visa validity.

Types Of Visas Eligible For Renewal

Since not all visas qualify for renewal, identifying those that can be extended is imperative. Among the various visa types that can be renewed are visitor visas (B1/B2) and diplomatic visas. The renewal process for a visitor visa typically involves completing the online nonimmigrant visa application form, submitting the required fee, and scheduling an appointment for those with a valid visa.

Various visas carry unique renewal requirements. For instance, renewing a US tourist visa necessitates visiting a US embassy or consulate abroad, arranging an interview with a visa official, and submitting the required paperwork. Be sure to familiarize yourself with the precise renewal requirements for your particular visa type to ensure a smooth experience.

Expiration Date And Validity

Prior to seeking visa renewal, checking the expiration date and validity of your visa is a requisite step. The expiration date refers to the last day you can use your visa to enter the United States, while validity pertains to the duration of time you’re authorized to remain in the country, starting from the date of visa issuance. A US visa can be renewed after it has expired, provided that it remains valid or has expired within the past 48 months.

To ensure a successful renewal process, it’s advisable to initiate the procedure no later than six months before your visa’s expiration date. By verifying your visa’s expiration date and validity, you’ll be well-prepared for a seamless renewal experience.

The US Visa Renewal Process

US visa renewal process overview

Having ascertained your eligibility for visa renewal, you can now proceed with the actual visa application process. This process is similar to your initial visa application, involving the completion of an application form, payment of the required fee, and scheduling an appointment if necessary.

We will examine the key facets of the US visa renewal process, which include filling out Form DS-160, collecting necessary documents, and arranging an interview if needed.

Completing Form DS-160

Form DS-160 is the application form required for obtaining US visas and US visa renewals. It can be completed through the Consular Electronic Application Center, and it must be filled out exclusively in English, using only English language characters. The confirmation page for Form DS-160 is of paramount importance, as it should be printed and brought to the interview and when submitting documents.

Accuracy is crucial when completing Form DS-160, as any errors or inconsistencies may lead to delays or even denials in the visa renewal process. Ensure that you provide truthful and up-to-date information to increase your chances of a smooth renewal.

Gathering Supporting Documents

During your US visa renewal, it’s important to collect all required supporting documents. These documents may vary depending on your visa type, but some common examples include:

  • A valid passport
  • Evidence of qualifications or degrees
  • Evidence of income or assets
  • Travel itinerary
  • Birth or marriage certificates

It’s crucial to check the specific requirements for your visa type to guarantee that you have all the required documents for the renewal process. Having all the necessary documents in order will not only expedite the process but also minimize the risk of visa denial.

Scheduling An Interview (if applicable)

In some cases, when renewing a US visa, an interview is required. To schedule an interview, you’ll need to:

  1. Complete the DS-160 form
  2. Pay the visa application fee
  3. Create an account on the U.S. Visa Information Service website
  4. Schedule the interview appointment through the online system

However, certain applicants may qualify for the Visa Interview Waiver Program, which allows for visa renewals without an in-person interview at the US Embassy.

The interview process can be a critical aspect of the US visa renewal process. Understanding the Visa Interview Waiver Program’s eligibility requirements and application process can help you determine if you need to schedule an interview and how to prepare for it if necessary.

Visa Interview Waiver Program

For some applicants, the Visa Interview Waiver Program offers a more convenient path to renewing their US visa. This program allows certain visa renewals to be processed without an interview, simplifying the renewal process and potentially saving valuable time and resources.

To fully comprehend the benefits of the Visa Interview Waiver Program, let’s explore its eligibility requirements and application process, which can help determine if you qualify for this convenient renewal option.

Eligibility Requirements

Several criteria must be met to qualify for the Visa Interview Waiver Program. Visas of the following categories are eligible for the program:

  • B-1/B-2
  • C-1/D
  • F
  • J
  • M
  • O

Additionally, applicants renewing a visa in the same classification within 48 months of the prior visa’s expiration are eligible for an interview waiver.

Knowing whether you meet the criteria for the Visa Interview Waiver Program can simplify your visa renewal process and potentially save you time and effort. Ensure that you carefully assess your eligibility before proceeding with the renewal process.

Application Process

If you’re eligible for the Visa Interview Waiver Program, the application process becomes more streamlined. Eligible applicants are only required to submit Form DS-160, pay the related filing fees, and await the processing of their application. The processing duration for the Interview Waiver Program is estimated to be four to six weeks from the time the application is received by the Consular Section.

By taking advantage of the Visa Interview Waiver Program, you can navigate the US visa renewal process with increased efficiency and minimal stress, especially if you have a visa prior. With our streamlined visa processing, you can focus on preparing for your visa interview and interview waiver with ease.

Paying The US Visa Renewal Fee

Paying US visa renewal fee

An essential aspect of the US visa renewal process is remitting the appropriate fees. The fees for visa renewal vary depending on the type of visa, and it’s crucial to understand the fee structure to ensure a hassle-free renewal experience.

Let’s explore the different fees associated with US visa renewal and the various payment methods available to submit these fees.

Fee Structure

Different types of visas come with distinct fees for renewal. For example, the renewal fee for a B-1/B-2 tourist visa is $185, while the fee for certain petition-based nonimmigrant categories (H, L, O, P, Q, and R) is currently $205. It’s essential to be aware of the specific fees for your visa type to ensure accurate payment.

In some cases, visa fee waivers may be available for those unable to pay the filing fees, and certain nonimmigrant visa applicants may benefit from interview waiver authorities, which can reduce visa appointment wait times.

Payment Methods

Many payment methods are accepted for the US visa renewal fee, such as:

  • Visa
  • MasterCard
  • American Express
  • Discover

You can remit the fees online through the Consular Electronic Application Center, ensuring that your card has sufficient funds to cover the fee.

By understanding the various payment methods available, you’ll be well-equipped to handle the financial aspect of your US visa renewal process without any complications.

US Visa Renewal Processing Time

US visa renewal processing time

US visa renewal processing times can fluctuate, and recognizing the factors that might influence the process duration is important. Being aware of these factors can help you plan accordingly and minimize any potential disruptions to your travel plans.

We will examine the elements that can influence the processing time of your US visa renewal and learn the procedure to check your application status.

Factors Affecting Processing Time

Several factors can influence the processing time of a US visa renewal. These factors include:

  • Pent-up demand
  • Regular seasonal demand
  • Typical causes for visa denials
  • The type of visa
  • Time of the year

Different visa types, including multiple entry visa, may have distinct processing times due to differing requirements, eligibility criteria, and workload.

Furthermore, backlogs at the consulate or embassy can cause extended wait times and delays in the processing of visa renewal applications. Being aware of these factors can help you better anticipate the processing time for your visa renewal and make necessary adjustments to your plans.

Checking Application Status

To check the status of your US visa renewal application, you’ll need your passport number, your immigrant or nonimmigrant visa application type, and your receipt number (if applicable). You can use the U.S. Department of State’s Visa Status Check portal or the Consular Electronic Application Center (CEAC) website to review your visa application status online.

Additionally, you may inquire about the status of your US visa renewal application via phone by contacting the USCIS National Customer Service Center, which is part of the Citizenship and Immigration Services. Keeping track of your application status will provide you with valuable insight into the progress of your visa renewal and allow you to be prepared for any potential disruptions.

What To Expect After Visa Renewal Approval

Upon approval of your US visa renewal, you will receive your renewed visa, which permits continued travel to the United States. The validity period of a renewed US visa can vary from 1 month to 10 years, depending on the type of visa. In some cases, there may be conditions attached to a renewed US visa, such as having a valid passport for at least six months prior to the intended departure date.

Upon receiving your renewed visa, you can utilize it immediately for travel, ensuring a seamless continuation of your journey in the United States.

Handling US Visa Renewal Denials

In case of a US visa renewal denial, comprehending the reasons for the denial and potential subsequent steps is important. Common causes of visa renewal denials include incomplete or inaccurate information on the application form and inadequate supporting documentation.

If your visa renewal is denied, you can take several steps to address the issue, including:

  1. Reviewing the denial letter
  2. Understanding the reason for denial
  3. Obtaining legal advice
  4. Reapplying or appealing
  5. Supplying additional information

By taking appropriate action, you can potentially overcome the denial and successfully renew your US visa.

Summary

Navigating the US visa renewal process can be a daunting task, but with the right knowledge and understanding of the process, you can ensure a smooth experience. This comprehensive guide has covered everything from eligibility criteria and the renewal process to handling denials and understanding processing times.

By following the steps and insights outlined in this guide, you’ll be well-equipped to successfully renew your US visa, allowing you to continue your journey in the United States with confidence and peace of mind.

Frequently Asked Questions

Do I have to renew my U.S. visa before it expires?

You need to renew your U.S. visa before it expires, as the expiry date stamped on the visa is different from that on your passport. It is recommended you apply for a new visa well in advance of your current visa’s expiration date.

How do I renew my U.S. visa online?

To renew your U.S. visa online, you must complete Form DS-160 (Online Nonimmigrant Visa Application) and upload a digital visa photo, pay the filing fees, then schedule and attend an interview at a U.S. Embassy or consulate.

Can I renew my U.S. visa without interview?

You may be eligible to renew your U.S. visa without an interview through the Interview Waiver Program (IWP), depending on your individual eligibility. This program allows certain types of visa holders, including some B visa holders, to renew their visa without attending an additional visa interview.

What types of visas are eligible for renewal?

Visitor visas (B1/B2) and diplomatic visas are eligible for renewal.

How can I check the status of my US visa renewal application?

To check the status of your visa renewal application, you can utilize the U.S. Department of State’s Visa Status Check portal or the Consular Electronic Application Center (CEAC) website.

Parents Visiting Visa USA Application Process

Are you planning to invite your parents to visit you in the United States? Navigating the visa process can seem overwhelming, but with the right information and guidance, you can help your parents obtain their visitor visa with ease. This ultimate guide will provide you with a comprehensive understanding of the B1/B2 Parents Visiting Visa USA application process, from understanding the different visa types to attending the visa interview and handling post-interview procedures.

By following this guide, you’ll be well-equipped to help your parents embark on their journey to the United States, ensuring they have a memorable and enjoyable visit. Let’s get started!

Key Takeaways

  • Understand the B1/B2 visa and its purpose for business-related activities (B1) or family visits & tourism (B2).
  • Prepare for application process ahead of time, including valid passport with photo, financial documents & proof of ties to home country.
  • Gather sponsorship documents and additional supporting documentation prior to attending the interview.

Understanding The Parents Visiting Visa USA (B1/B2)

Tourist visa application process

The B1/B2 visa, also known as a US visitor visa or temporary tourist visa, is a non-immigrant, multiple entry visa designed for temporary visits to the USA, such as tourism and family visits. The B1 visa caters to individuals engaging in business-related activities, while the B2 visa targets those visiting the United States for tourism or family visits. The visitor visa interview is an integral part of the application process, requiring applicants to present an application fee payment receipt during the visa appointment.

Some countries participate in the Visa Waiver Program, which allows their citizens to visit the USA without a visa for short stays. However, if your parents are from a country that requires a visa, they will need to apply for the appropriate B1 or B2 visa, depending on the purpose of their visit.

B1 Visa: Business Visitor

The B1 visa is a temporary business visitor visa, permitting individuals to enter the United States for legitimate business activities. To be eligible for a B1 visa, one must possess a valid passport valid for at least 6 months after the intended stay, complete the Form DS-160, and pay the application fee.

Activities authorized under a B1 visa include:

  • Attending business meetings and conferences
  • Negotiating contracts
  • Consulting with business associates
  • Conducting research or training
  • Attending trade shows or exhibitions
  • Participating in short-term training programs

However, activities such as accepting employment, studying at a school or university, and conducting personal business for profit are not authorized. Engaging in illegal activities is also strictly prohibited.

B2 Visa: Tourist Visitor

The B2 Visa is specifically designed for tourists and family visits, including parents visiting their children in the United States. To apply for a B2 visa, parents must provide a list of supporting documents of the sponsor with J1, L1, F1, or H1B visa status. Additionally, parents must bring the following documents:

  • Original passport
  • Employment letter (if applicable)
  • Bank statement with sufficient balance
  • Aadhar card
  • DS-160 confirmation page
  • Appointment confirmation page
  • Any other useful IDs

Parents can stay in the USA for a maximum of 6 months in one visit, making the B2 visa an excellent option for those wishing to spend an extended period with their children or explore the country as tourists.

Preparing For The Application Process

Preparing for visa application process

Before commencing the visa application process, it’s necessary to verify your parents hold a valid passport with at least six months of validity beyond their expected stay period in the United States. Additionally, they will need to gather financial documents and proof of ties to their home country, as these documents play a crucial role in demonstrating their intention to return home after their visit.

Guiding your parents through the application process is beneficial, assisting them in understanding the requirements and preparing all requisite documents. This not only simplifies the application process for visa applicants but also enhances their chances of visitor visa approval.

Valid Passport And Photo Requirements

A valid passport is a basic requisite for the B1/B2 visa application process. The passport must hold a validity of at least six months beyond the anticipated stay period in the United States. Additionally, your parents will need to provide a passport photo taken within the last 6 months. The passport photo can be either digital or physical and must adhere to the exact photo specifications for a B1/B2 visa application.

If your parent’s passport is nearing expiration and they are applying for a B1/B2 visa, they can continue using their valid visa on the expired passport. However, carrying both the current passport and the old passport with the valid visa during travel is vital. Additionally, it is recommended to obtain a new passport.

Financial Documents And Proof Of Ties

Financial documents and proof of home country ties are significant during B1/B2 visa processing, as they signify the applicant’s strong bond with their home country and their intent to return post their United States visit. For the B1/B2 visa application, the financial document should include:

  • Bank statements from the past 6 months
  • Bank account verification or balance letter
  • Proof of income
  • Tax payments
  • Property or business ownership, or assets
  • Proof of financial support while in the US
  • Evidence of strong local ties

To demonstrate strong ties to their home country for a B1/B2 visa application, parents can provide documents indicating their connections and commitments to their home country, such as:

  • Proof of property ownership
  • Employment or business ties
  • Educational or professional commitments
  • Family relationships
  • Financial stability

Completing The DS-160 Form Online

The DS-160 form is a mandatory document for the US tourist visa application process. To access the form, parents can:

  1. Create an account
  2. Fill out the necessary information online
  3. Seek assistance from a visa processing assistant or use the Consular Electronic Application Center.

The required information and required documents include:

  • Name
  • Address
  • Passport information
  • Travel details
  • Contact information
  • Family information
  • Employment
  • Educational background

Upon submitting the form, a confirmation page will be generated, which should be saved as a PDF for future use during the interview. It is advisable to print or save the whole application form. This can be used as a reference in the future.

Scheduling The Visa Interview And Biometrics Appointment

Scheduling visa interview at US Embassy

Scheduling the visa interview and biometrics appointment is a vital step in the visitor visa application process. For appointment scheduling, your parents must complete the DS-160 form online, pay the visa application fee, followed by scheduling the visa interview and biometrics appointment.

The initial appointment will be for biometrics, typically conducted at the Visa Application Center (VAC) or Offsite Facility Center (OFC). The US consulate will set up a second appointment for the visa interview. This is necessary in order to complete all the procedures. It’s essential to guide your parents through this process, ensuring they understand the requirements and are well-prepared for both appointments.

Gathering Required Documentation For The Interview

As a segment of the visa application process, your parents must accumulate various mandatory documents for the visa interview, including sponsorship documents and any other necessary supporting documents. It is crucial to ensure that all the necessary documents are prepared and organized, as this will not only ensure a smooth application process but also increase their chances of obtaining the visitor visa.

In addition to the documents required for the B2 visa application, your parents may be asked to provide further documentation to establish their qualification for the visa during the interview. These may include evidence of employment and family ties, which can demonstrate their intention to return home after their visit.

Sponsorship Documents

Sponsorship documents, such as employment letters and graduation invitations, are necessary for the visa application process. The employment verification letter should include details such as the date of employment, position held, and salary earned. Furthermore, if the sponsor is an employee or a student in the US, additional documentation may be required depending on their status.

It is important to ensure that your parents have all the necessary sponsorship documents for their visa application, as this will not only ensure a smooth application process but also increase their chances of obtaining the visitor visa.

Additional Supporting Documents

Additional supporting documents may be required to establish qualification for the visa, such as evidence of employment and family ties. Specific examples of employment evidence required for a B1/B2 visa application may include:

  • An employment letter from the employer stating the position, duration of employment, and salary
  • Pay stubs or bank statements to demonstrate regular income
  • Tax returns or W-2 forms to demonstrate employment history and income
  • Business registration documents if self-employed
  • Contracts or agreements with clients or customers if a freelancer or consultant

To demonstrate family ties for a US B1/B2 visa application, birth certificates of spouse and dependents, marriage certificate, and photos depicting a genuine connection to family and friends are required. By providing all the necessary supporting documents, your parents will be better prepared for their visa interview and increase their chances of success.

Attending The Visa Interview

Attending the visa interview for parents visiting USA

The visa interview is a critical part of the application process, where the consular officer will assess the applicant’s eligibility to receive a visa in accordance with U.S. law. Guiding your parents for a successful interview is crucial, aiding them in understanding the requirements and preparing well for potential questions.

During the visa interview, your parents may be asked about their children in the US and the reasons for their visit. If they are unsure of the meaning of a question, it is recommended that they ask the visa officer to repeat the question rather than attempting to answer without understanding the context.

Post-Interview: Visa Approval And Passport Collection

A successful visa interview results in visa granting and enables your parents to retrieve their passport. In case of visa denial, the consular officer provides your parents with a document detailing the reasons for visa refusal. It is important to remain patient throughout the process, as the estimated processing time for Parents Visiting Visa USA (B1/B2) approval and passport collection is approximately two months.

The visa approval process is complete. The passport of your parents, with the corresponding visa stamped on it, will be mailed back. At this point, they can proceed with their travel plans and look forward to their visit to the United States.

Health Insurance And Travel Preparations

Health insurance for parents visiting USA

Being prepared for any probable health issues in the USA is vital due to the potentially high healthcare costs. Obtaining visitor medical insurance for your parents before their trip is highly recommended. To find suitable travel insurance providers, you can obtain free no-obligation travel insurance quotes.

Patriot America Plus from IMG and HTH Worldwide’s TripProtector Preferred Plan are both recommended options for parents visiting the USA on a B1/B2 visa. These plans provide coverage for medical expenses incurred during the visit, ensuring that your parents are well-protected throughout their stay in the United States.

Extending Stay And Changing Visa Status

If your parents intend to extend their USA stay, they can apply for it by following these steps:

  1. Submit Form I-539 at least 45 days prior to the expiration of their authorized stay.
  2. Provide supporting documents and evidence.
  3. Pay the necessary fees.
  4. Await the United States Citizenship and Immigration Services (USCIS) to process the application.

Parents visiting the USA on a B1/B2 visa may also be eligible to request a change in their nonimmigrant status to another category through USCIS. However, it is important to consider the specific requirements and eligibility criteria for each visa category before making any decisions.

Summary

In conclusion, helping your parents navigate the B1/B2 Parents Visiting Visa USA application process can be a rewarding experience, ensuring they have a memorable and enjoyable visit to the United States. By following this ultimate guide, you have learned about the different visa types, the application process, the required documentation, and the importance of health insurance and travel preparations.

With the right information and guidance, you can help your parents obtain their visitor visa with ease, allowing them to spend quality time with you and explore the United States. So, let’s make their dream visit a reality!

Frequently Asked Questions

What type of visa is required for parents to visit USA?

Parents who wish to visit the USA require a B-2 tourist visa, unless they qualify for the US Department of State’s Visa Waiver Program which permits up to 90 days stay without obtaining a visa.

How long parents can stay on visitor visa in USA?

Your parents can stay in the United States for a maximum of six months with a visitor visa. If they want to stay longer, they can explore options such as becoming green card holders to become permanent residents.

Can I applying for my parents green card while on tourist visa?

You may be able to apply for a change of status for your parent, allowing them to stay in the U.S. and obtain their green card. However, sufficient supporting documentation and the appropriate forms are necessary.

What is the difference between a B1 and B2 visa?

A B1 visa is intended for business-related activities, while a B2 visa is designed for tourism and visiting family members.

What are the passport and photo requirements for the B1/B2 visa application process?

A valid passport with at least six months of validity and a recent passport photo taken within the last 6 months are required for the B1/B2 visa application process.

Less Stress. More Visa Success. Since 2009. Apply With Confidence.

Get started